


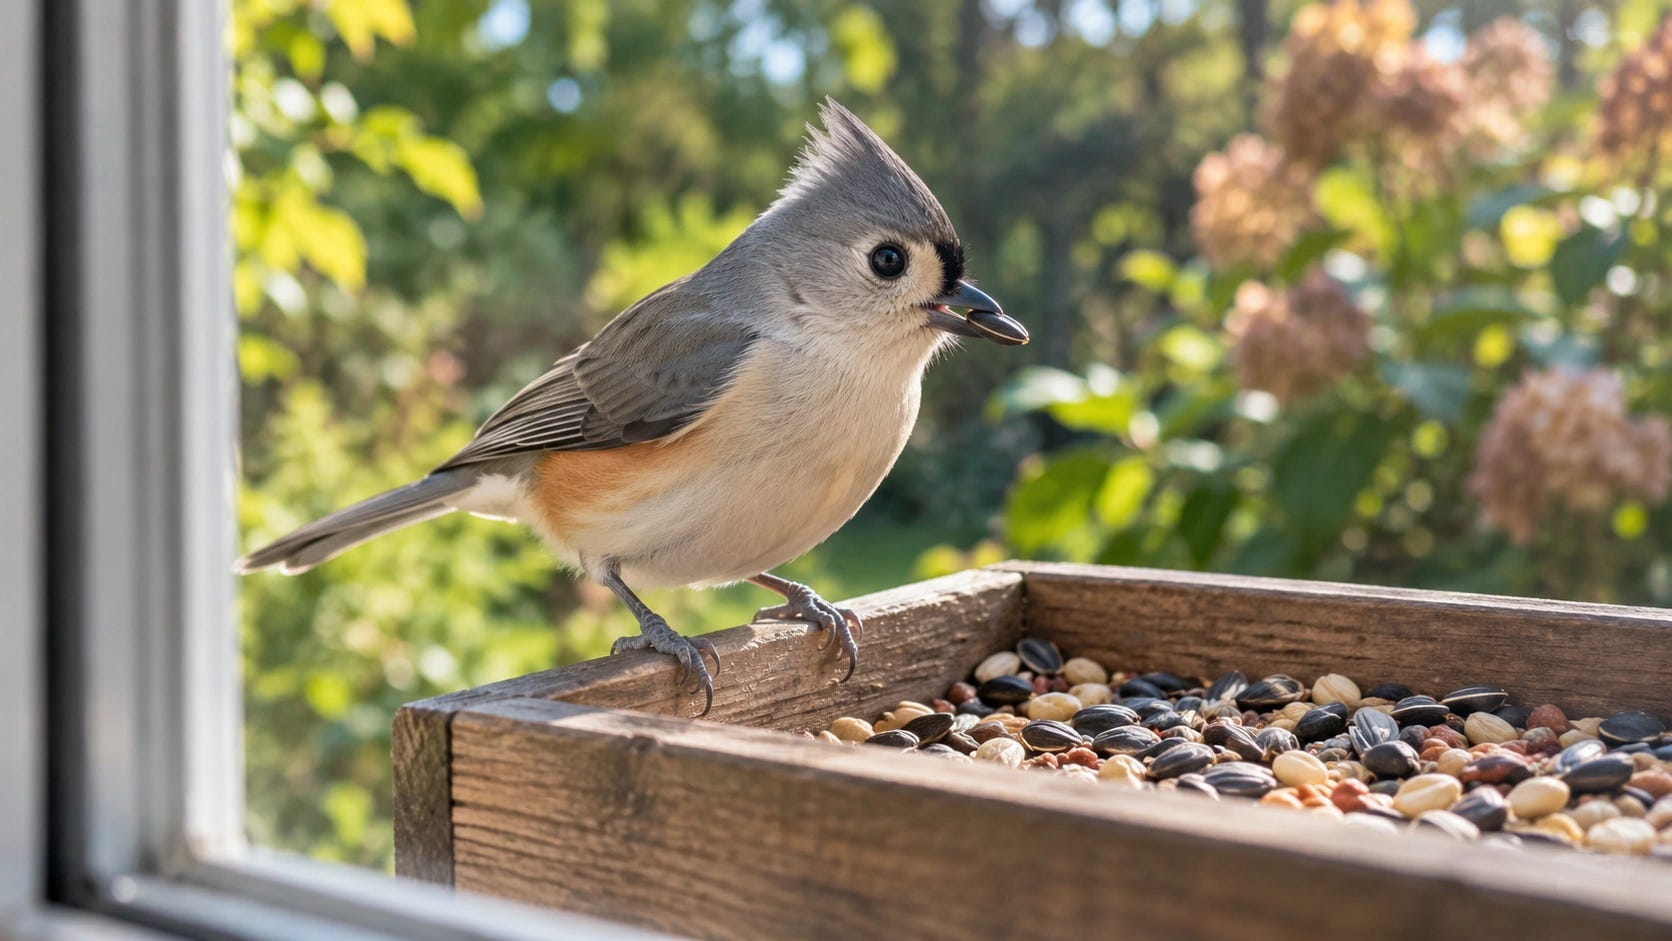
A DIY AI bird feeder can photograph garden visitors, predict their species, and keep a searchable record without a wildlife-camera subscription. A Raspberry Pi, an AI Camera, and a local bird-classification model handle the work. Disable the project’s optional hosted fallback, and identification can stay on your own hardware.
Developer Renan Fernandes has already demonstrated the idea with TitPi, a Raspberry Pi bird feeder project with published source code. His setup watches a feeder through a window, detects approaching birds, identifies likely species, and displays the results on a local dashboard.
The build uses a Pi Zero 2 W rather than a larger AI computer. Its camera handles the first detection stage, leaving the Pi to classify photographs, save visits, and serve the dashboard.
How the DIY AI bird feeder works
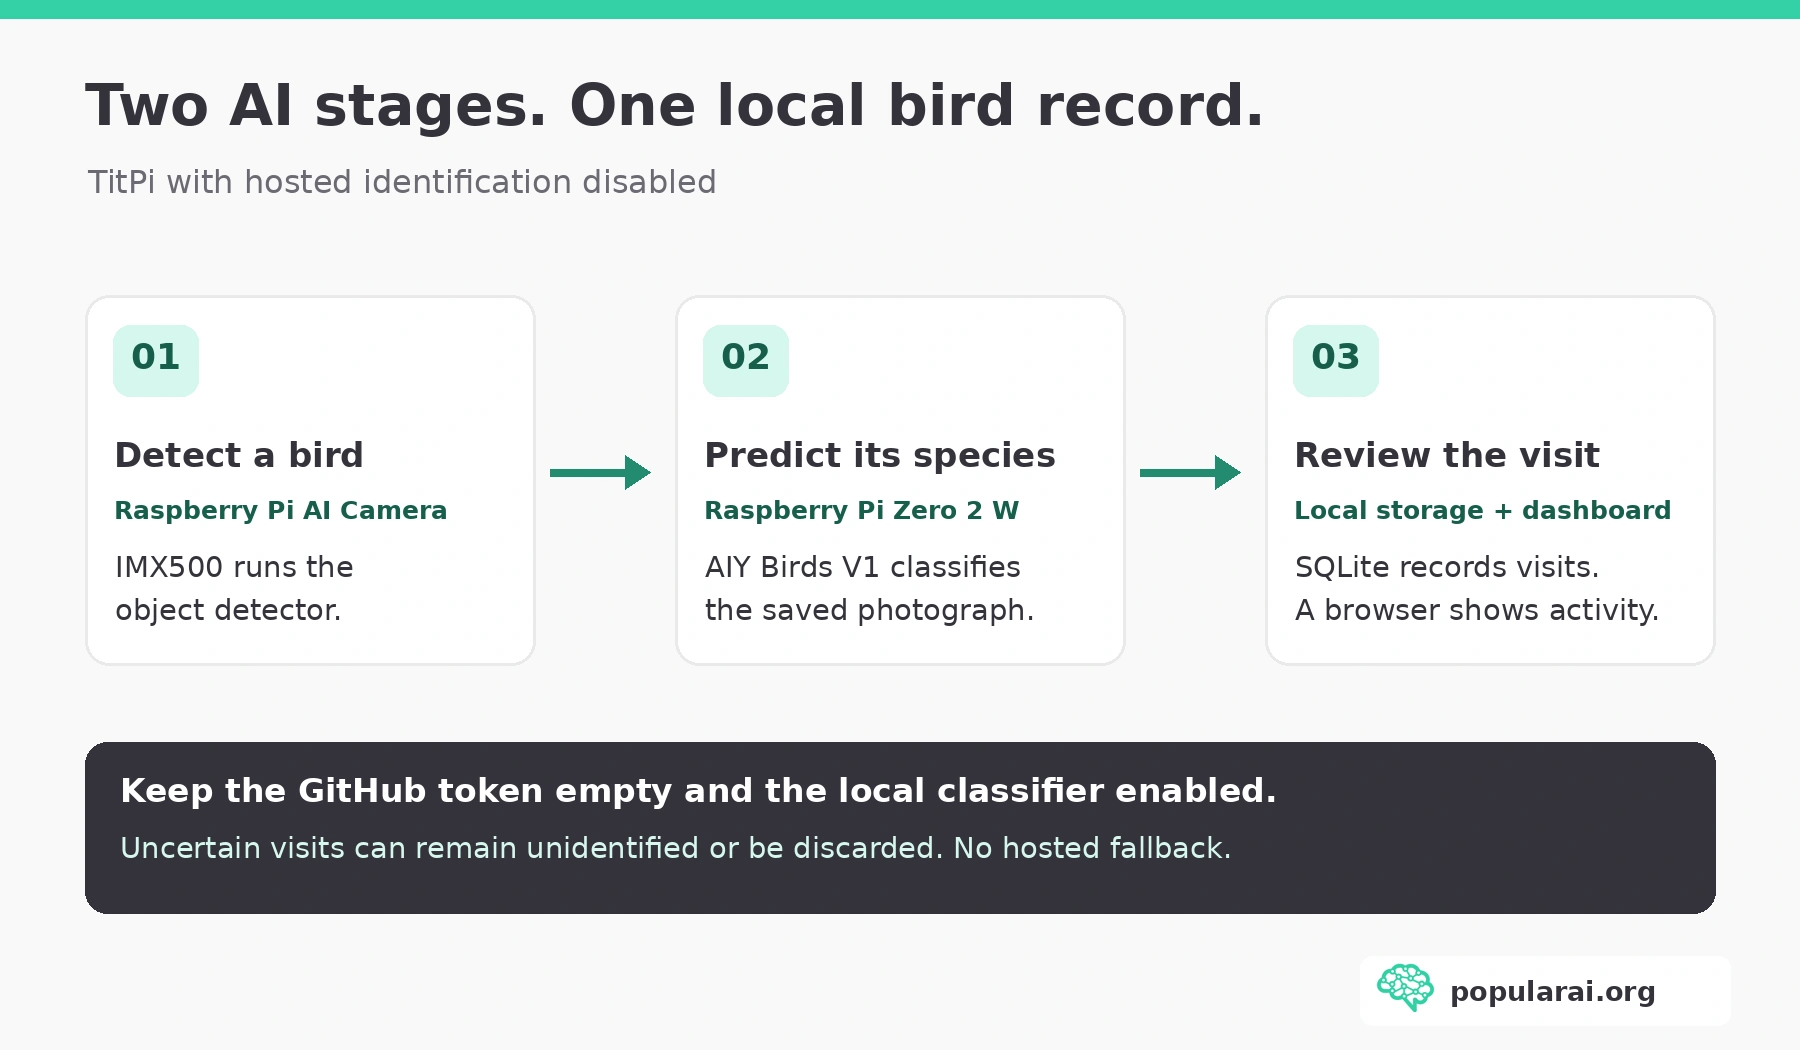
TitPi uses a Raspberry Pi Zero 2 W connected to a Sony IMX500 AI Camera. The camera performs the initial object detection, while the Raspberry Pi handles photographs, species classification, and the visitor database.
▪ The Raspberry Pi AI Camera runs neural networks on its imaging sensor. That reduces the work required from the Pi’s processor. Detecting a bird on the sensor and identifying its species on the Pi are different jobs, so the camera’s accelerator does not remove the need for the local classification model.
▪ Detection and species identification are separate stages. First, the camera detects an object that appears to be a bird. It looks for a change in detection confidence and triggers a photograph when that change is sustained.
Second, a TensorFlow Lite model examines the image and predicts the bird’s species.
▪ Species identification is the harder task. Recognizing an object as a bird is relatively straightforward compared with distinguishing a female house finch from a purple finch, especially when the photograph is blurry or poorly lit.
TitPi also includes an optional hosted-model fallback for uncertain identifications. We’ll disable that component to keep the identification process local.
The finished system can save photographs, record visits in SQLite, and display recent activity through a browser. No commercial wildlife-monitoring account is required.
What you need to build the AI bird feeder
Start with the hardware used by TitPi itself. The AI Camera already contains inference hardware, so this setup doesn’t need a separate AI accelerator. Keeping the hardware close to the project’s documented combination also gives you fewer differences to investigate if installation fails.
The U.S. retailer prices below were checked at time of publication. Prices and availability can change. They are component prices, so leave room in the budget for the parts that make the camera usable beside a window.
▪ The Raspberry Pi Zero 2 W runs the camera software, local classifier, database, and dashboard.

Its 512 MB of RAM keeps the board inexpensive but limits the resources available to those jobs. PiShop US lists the Raspberry Pi Zero 2 W at $17.25.
▪ The Raspberry Pi AI Camera (IMX500) handles object detection directly on the camera sensor.

Its inference hardware avoids the need for an additional AI HAT or USB accelerator. PiShop US lists the Raspberry Pi AI Camera at $74.95, in stock.
You will also need a 32 GB or larger microSD card, a reliable 5V micro-USB power supply, a camera mount, and a feeder positioned close enough to capture clear photographs.
Pay attention to the ribbon cable. The Pi Zero’s camera connector is the smaller 22-pin type. Use a compatible standard-to-mini cable rather than assuming a cable from an older Raspberry Pi will fit.
Budget roughly $110–$140 for a complete basic setup with power, storage, mounting materials, and a cable, before shipping or taxes. A feeder itself may cost extra.
The hardware can remain indoors, looking through a clean window toward an outdoor feeder. This avoids building a weatherproof electronics enclosure.
Step 1: Install Raspberry Pi OS
Start with a fresh microSD card and Raspberry Pi Imager.
TitPi documents Raspberry Pi OS Bookworm 64-bit. As of October 2026, Bookworm is available as Raspberry Pi OS Legacy, while newer Raspberry Pi OS releases use Trixie. Use Legacy Bookworm 64-bit Lite for the closest match to the project’s documented setup.
In Raspberry Pi Imager, configure the hostname as titpi, create the username titpi with a strong password, add your Wi-Fi credentials, and enable SSH.
After flashing the card, insert it into the Raspberry Pi, connect the camera ribbon with the power disconnected, and boot the board.
Open a terminal on your computer and connect:
ssh titpi@titpi.localOnce connected, update the operating system and install the camera dependencies:
sudo apt update
sudo apt full-upgrade -y

sudo apt install -y \
  git python3-venv \
  imx500-all python3-picamera2 \
  python3-flask python3-requests \
  python3-pil python3-numpy ffmpeg

sudo reboot
The initial AI Camera firmware load may take several minutes. Allow that first load to finish before treating the delay as an installation failure. The camera test below gives you a separate checkpoint before TitPi and its classifier enter the picture.
After reconnecting, confirm the camera works by capturing a photograph:
rpicam-still -o test.jpg -t 2000Check that test.jpg exists before installing the bird-identification software.
Step 2: Download and configure TitPi
Download the TitPi source code to the directory expected by its service files:
git clone https://github.com/renanfernandes/titpi.git \
  /home/titpi/titpi

cd /home/titpi/titpi

cp config_example.json config.json
Create a Python virtual environment that can still access the camera libraries installed through Raspberry Pi OS:
python3 -m venv --system-site-packages .venv

.venv/bin/python -m pip install ai-edge-litert
This avoids installing Python packages into the operating system with --break-system-packages.
The published source also has an import that needs correcting. The checked-in watcher.py imports notifier_lcd, but that file is excluded from the repository. The regular notification module is available.
Correct the import:
sed -i \
  's/from notifier_lcd import send_detection_email/from notifier import send_detection_email/' \
  watcher.py
This allows the watcher to use the supplied notification module. Email alerts remain optional.
Step 3: Install the local bird-identification model
TitPi’s species classifier uses Google’s AIY Birds V1 model, which supports roughly 964 bird species.
The source repository includes the species-label files but excludes the .tflite model itself. You must supply it separately.
Google’s AIY bird-classification model is available through Kaggle. TensorFlow’s published documentation also provides this download command:
cd /home/titpi/titpi

curl -fL --retry 3 \
  'https://tfhub.dev/google/lite-model/aiy/vision/classifier/birds_V1/3?lite-format=tflite' \
  -o aiy_birds_v1.tflite
The legacy TensorFlow Hub download endpoint could not be independently confirmed as working during this review. If it fails or downloads an HTML page, use the official Kaggle model download instead and save the model as aiy_birds_v1.tflite.
Check that the downloaded file is a genuine TensorFlow Lite model before proceeding:
python3 -c '
with open("aiy_birds_v1.tflite", "rb") as f:
    f.seek(4)
    assert f.read(4) == b"TFL3", "Invalid TFLite file"
print("Model header OK")
'
The expected result is Model header OK. That confirms the file format, although it doesn’t prove the model will load or produce accurate predictions.
Keep the model and TitPi’s label files together in /home/titpi/titpi/.
Step 4: Disable cloud identification
TitPi can identify birds locally, but its optional fallback changes where uncertain photographs are processed. Check this configuration before leaving the watcher running.
The TitPi identification code tries local classification first. When the confidence is too low, it can send the photograph to a hosted model through GitHub Models if a token is configured.
For a local-only build, leave the GitHub token empty and keep the local classifier enabled.
Edit config.json:
nano config.jsonMake sure the corresponding sections contain these values:
"github": {
  "token": "",
  "model": "",
  "identify_all": false
},
"local_classifier": {
  "enabled": true,
  "min_confidence": 0.3
}
Keep the existing camera settings intact. Change target_labels to ["bird"] if you only want bird detections.
With no GitHub token, the code does not invoke the hosted fallback. An uncertain bird may consequently be left unidentified or discarded. For this build, accepting an unidentified visit preserves the reason for choosing local identification in the first place. A species label is optional. Keeping photographs off a hosted identification service is the requirement.
Step 5: Start the watcher and dashboard
Before activating the background services, make their Python paths point to the virtual environment:
sed -i \
  's#/usr/bin/python3#/home/titpi/titpi/.venv/bin/python3#' \
  services/titpi.service services/titpi-web.service
Install the two services:
sudo cp services/titpi.service \
  services/titpi-web.service /etc/systemd/system/

sudo systemctl daemon-reload

sudo systemctl enable --now \
  titpi.service titpi-web.service
To inspect the watcher:
sudo journalctl -u titpi.service -n 50 --no-pagerLook for camera initialization followed by Watcher Active. If the service crashes, the journal output is the first place to look.
The dashboard should now be available at:
http://titpi.local:8080The dashboard will initially be empty. Wait for the camera to record detections before expecting species records or visitor activity to appear. An empty page at this stage does not, by itself, show that identification has failed.
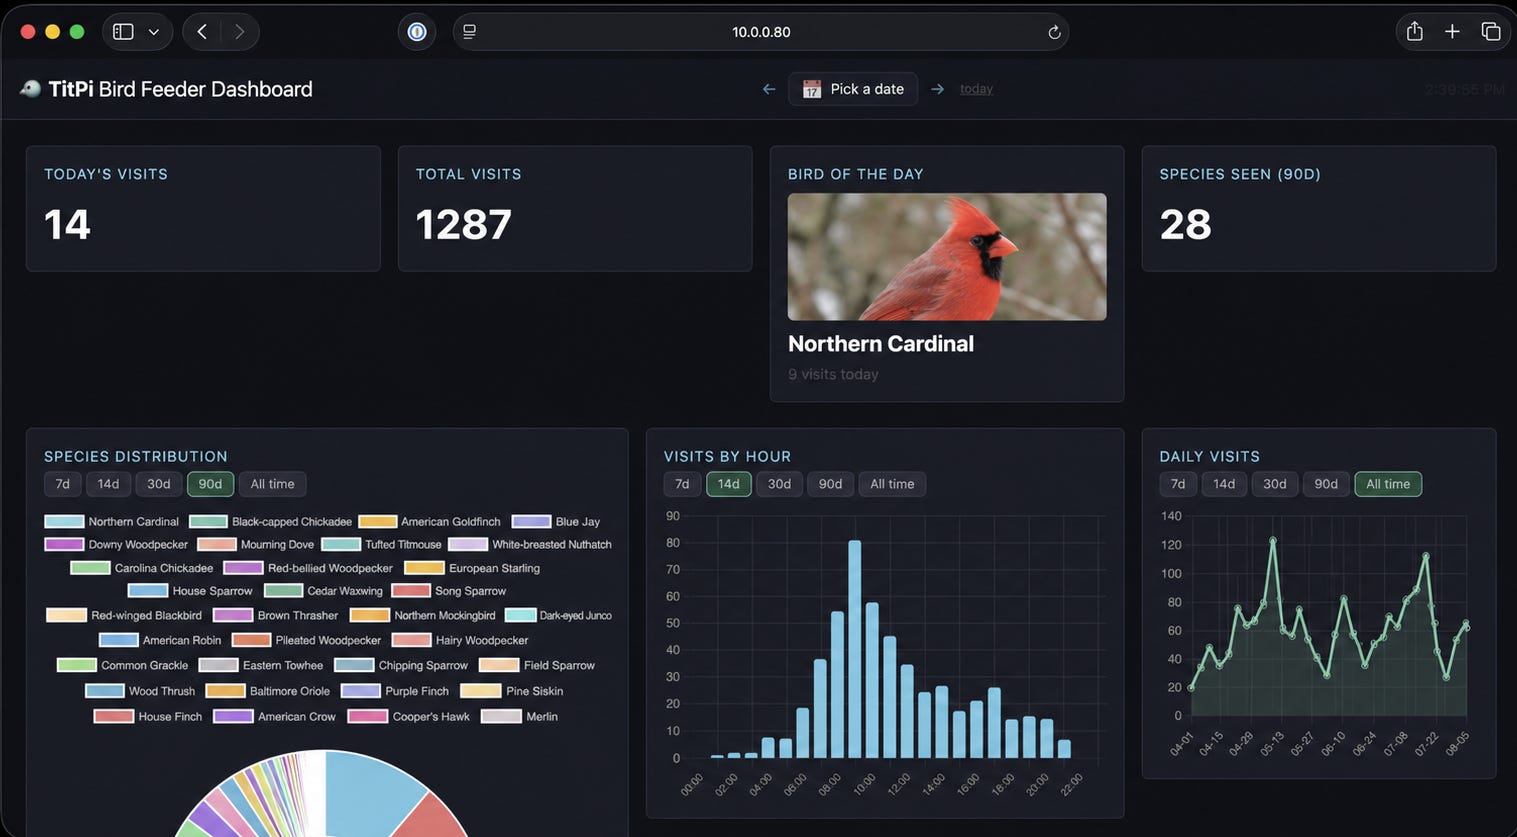
Once birds start visiting, the application can display photographs, species names, activity charts, and recent detections.
Step 6: Check whether the system identifies birds correctly
▪ Start by aiming the camera so visiting birds occupy a substantial part of the image. Small birds against a large background give the classifier less useful visual information.
TitPi’s current classification script resizes the photograph for the AIY model. It does not independently guarantee a tight crop around every detected bird.
That limits accuracy when birds are far away. A working detector can therefore trigger photographs while the species classifier still receives too little bird detail to make a useful prediction. Check the saved image before assuming the model needs replacing.
▪ For a useful first evaluation, collect 20–30 manually identifiable photographs and compare the predictions against your own observations.
Record four outcomes: correct species, incorrect species, bird present but unidentified, and false detection.
A confidence score is the model’s estimate. It is not a guarantee of accuracy. A prediction of 80% does not establish that the identification is correct.
Look for mistakes involving similar species, juvenile plumage, shadows, and birds facing away from the camera. Correct obvious errors through the dashboard rather than treating every AI-generated label as a verified wildlife observation.
Step 7: Test that identification really works offline
Leave the Raspberry Pi connected to your local Wi-Fi but block its internet access through your router. That preserves access to the local dashboard.
Then observe the feeder and check the watcher logs.
If the camera detects birds and new species records appear while external internet access is blocked, you have demonstrated that the essential detection, classification, and logging path works locally.
A stronger check uses the router’s connection logs to confirm no successful outbound requests were made during the test.
A dashboard on your local network still needs sensible access limits. TitPi’s Flask application listens on the local network without built-in user authentication. Don’t forward port 8080 through your router or expose it directly to the public internet.
Common problems and how to fix them
The camera works, but no birds are detected
Confirm that the configured IMX500 model exists in
/usr/share/imx500-models/. Check the camera ribbon and look for IMX500 initialization errors in the service journal.The detector may also be struggling with distance, glare, or the camera angle. Bring the feeder closer before changing sensitivity thresholds.
Bird detections appear, but species names are missing
Check that
aiy_birds_v1.tfliteis present and that the local classification runtime loads correctly. Inspectjournalctlfor errors mentioning the classifier.If the model isn’t available, the fully offline configuration has no hosted fallback to rescue the identification.
The system misses short visits
Decrease the confirmation-frame requirement cautiously and review the cooldown setting.
Both controls reduce repeated or accidental detections, but aggressive settings can miss birds that land and leave quickly.
Photographs are poor through the window
Move the camera closer to the glass, avoid reflections from indoor lights, and adjust its position so the bird is clearly visible.
Better photographs are usually more valuable than changing recognition models immediately.
Build a local AI bird feeder you can check and improve
A Raspberry Pi AI bird feeder is worth building if you want to experiment with wildlife observation and local computer vision. The IMX500 provides a useful introduction to running object detection on inexpensive hardware, and TitPi adds a practical local dashboard.
Other projects demonstrate different approaches. BirdNET-Pi identifies birds from sound rather than photographs, while Bird Feeder AI uses a Raspberry Pi 5 with a Hailo accelerator for a more demanding camera pipeline.
The simpler IMX500 approach is a sensible place to begin for this camera-based project. You can produce a useful local record of visiting birds without maintaining a large AI computer or paying for image-analysis requests.
There is also room to experiment with other household camera projects. Our DIY AI refrigerator camera guide shows another way to turn inexpensive camera hardware into a practical computer-vision system.
Start with the camera, local classifier, and dashboard. Once you can consistently recognize common visitors, improve the camera position and use your corrected photographs to judge whether the AI is actually doing its job.
More on AI camera applications:

Explore more from Popular AI:
Start here | Local AI | Builds & gear | Autonomy & policy | Fixes & guides | Popular AI podcast