


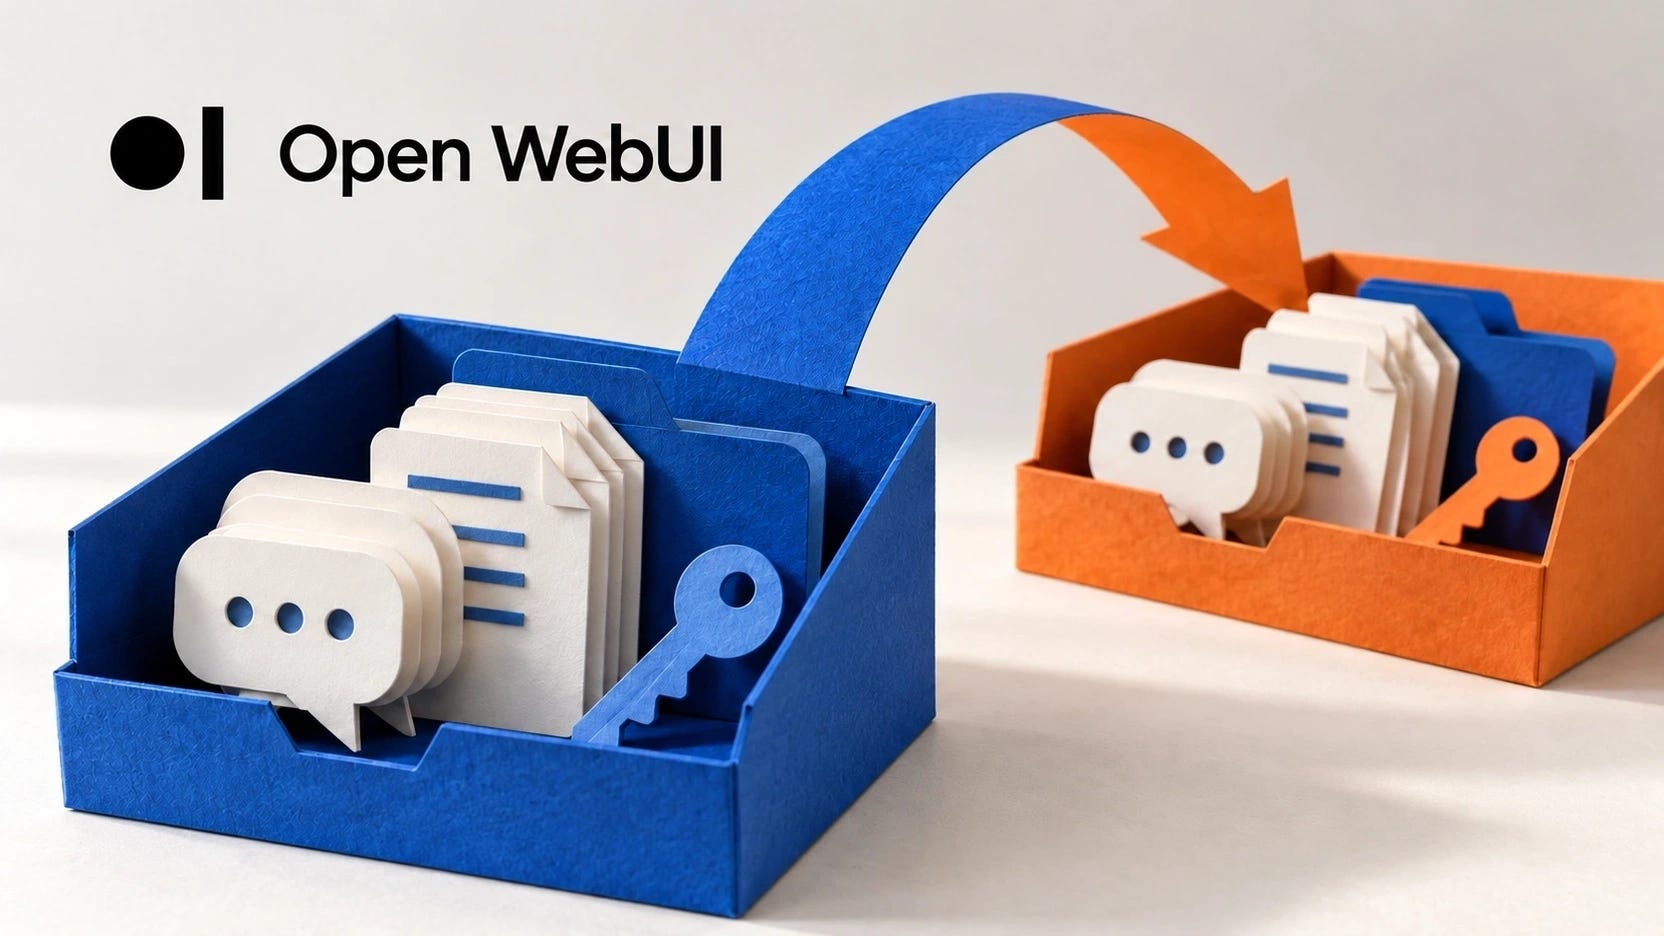
An Open WebUI backup needs more than the Export Chats button. A chat JSON file lets you move conversations to another account. Recovering the installation also requires its users, uploaded documents, knowledge-base data, and configuration.
For a typical Docker installation, back up the entire persistent data volume, preserve the deployment settings and original secret key, and test recovery in a separate instance. Do that before updating Open WebUI or moving it to another server.
Quick answer: chat export or full Docker backup?
Use Export Chats for a portable copy of conversations. Use a cold backup of the persistent Docker volume when you need to recover the installation. Keep your Docker Compose file, environment settings, original encryption key, and any external databases or model storage alongside that archive.
Test the restore with a new, empty volume and a second Open WebUI container on a different port. Leave the production volume untouched. Restoring over a populated volume can destroy newer chats and files, so a backup check should never require replacing your live data.
This walkthrough covers a single Docker or Docker Compose instance using SQLite and local file storage. The terminal commands use a Linux/macOS shell, including WSL with Docker available. PostgreSQL, cloud object storage, and distributed deployments need additional backups. Confirm that your installation fits those assumptions before using the single-volume procedure below.
▪ Step 1: Export a portable copy of your chats
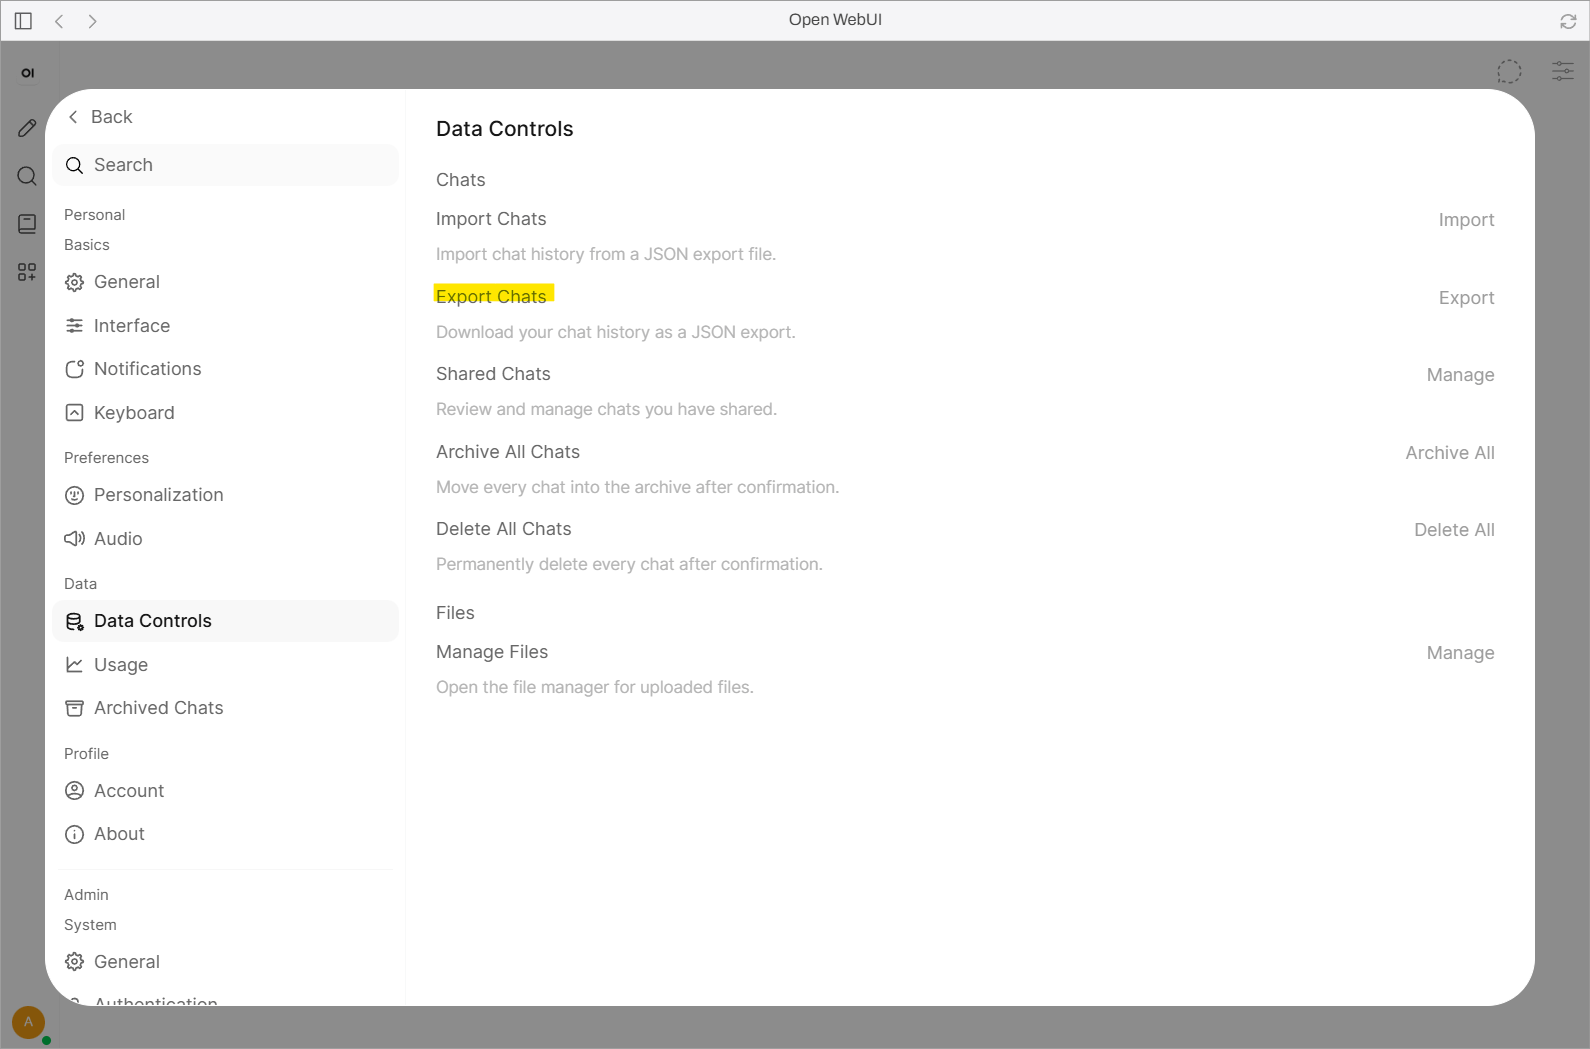
In Open WebUI, open your profile menu, then Settings → Data Controls → Export Chats. The downloaded JSON includes conversation messages, model details, timestamps, and chat structure. To import it elsewhere, use Import Chats in the same menu.
Imports add conversations rather than replacing existing ones. Importing the same JSON twice creates duplicates. The export is not a substitute for uploaded file bytes, user accounts, the knowledge-base index, or server settings.
Keep the JSON export as an extra recovery option, especially if you only need to move your personal conversations. For a full server migration, continue with the data-volume backup. Importing chats alone will not recreate the rest of the installation.
▪ Step 2: Find the volume that actually holds your data
Open a terminal on the machine running Open WebUI. Replace open-webui below with the actual container name if yours differs.
docker ps -a --format 'table {{.Names}}\t{{.Image}}'

docker inspect open-webui --format '{{range .Mounts}}{{println .Destination .Type .Name .Source}}{{end}}'

docker inspect open-webui --format '{{.Config.Image}}'
Look for the mount whose destination is /app/backend/data. A named Docker volume will show volume and its actual name, perhaps open-webui or a Compose-generated project prefix such as myapp_open-webui. A bind mount points to a host directory instead.
Use the mount you found on your own machine. A volume name copied from another tutorial may point to entirely different data. Record both the volume name or host path and its destination inside the container before continuing.
For the default SQLite setup, the data folder commonly includes webui.db, uploads/, and vector_db/. Database records without the associated uploads can leave conversations pointing to missing documents.
A running database can also use SQLite write-ahead log files, so stop all processes writing to it before taking a file-level backup.
▪ Step 3: Back up the complete Docker volume
Before stopping Open WebUI, record the image version and save your Compose file, .env file, reverse-proxy configuration, and other deployment settings somewhere private. Keep these with the matching backup so you can recreate the deployment that produced it.
Preserve the original WEBUI_SECRET_KEY. If Docker generated the key automatically, it can live at /app/backend/.webui_secret_key, outside the data volume.
While the original container still exists, copy that file to secure storage if applicable:
mkdir -p "$HOME/openwebui-backups"

docker cp open-webui:/app/backend/.webui_secret_key \
  "$HOME/openwebui-backups/webui-secret-key"
If that file does not exist, check whether your deployment supplies WEBUI_SECRET_KEY through its environment or secrets manager. Do not replace a working key with a newly generated one. Keep backup directories containing keys accessible only to authorized users.
For a named volume, substitute the name discovered in Step 2 and run:
VOLUME="YOUR_ACTUAL_VOLUME_NAME"
BACKUP_DIR="$HOME/openwebui-backups"
ARCHIVE="openwebui-$(date +%Y%m%d-%H%M%S).tar.gz"
IMAGE="$(docker inspect open-webui --format '{{.Config.Image}}')"

docker stop open-webui

docker run --rm -v "$VOLUME:/data:ro" \
  -v "$BACKUP_DIR:/backup" \
  alpine tar -C /data -czf "/backup/$ARCHIVE" .

docker start open-webui
If the backup command fails, start the original container again and investigate before updating. This archives the full data directory, including hidden entries, using the same Docker volume-and-tar approach as the official update procedure.
For a bind mount, stop Open WebUI and archive the real host directory instead:
docker stop open-webui

tar -C /actual/host/data/path \
  -czf "$HOME/openwebui-backups/openwebui-bind.tar.gz" .

docker start open-webui
Use the procedure that matches your mount type. Keep the backup destination outside the data directory you are archiving, whether you use a named volume or a host bind mount.
▪ Step 4: Check the archive before trusting it
Run these commands against the named-volume archive from Step 3:
tar -tzf "$BACKUP_DIR/$ARCHIVE" > /dev/null

tar -tzf "$BACKUP_DIR/$ARCHIVE" \
  | grep -E 'webui.db|uploads/|vector_db/'

ls -lh "$BACKUP_DIR/$ARCHIVE"
A successful first command means the compressed archive can be read. For a standard local setup, expect to find webui.db and, if used, uploads and vector storage.
A readable archive proves that tar can open it. Open WebUI still needs to start from the recovered files and read their contents correctly. Copy the archive and protected configuration to separate storage, preferably another physical device, before the next update.
▪ Step 5: Restore into a disposable Open WebUI installation
⚠️ Do not extract this archive into your existing production volume. The following commands restore it into a fresh volume for an isolated single-instance SQLite test. Check that the test container name and volume name are unused before running them. The target must be empty, even if you have performed a restore check before.
Want to make sure your Open WebUI backup can actually be restored?
Paid subscribers get the complete recovery walkthrough, including the Docker commands, isolated restore procedure, and checks for recovered chats, files, and settings.
Subscribe or upgrade to a paid subscription to unlock the full guide and support Popular AI.
What can still go wrong?
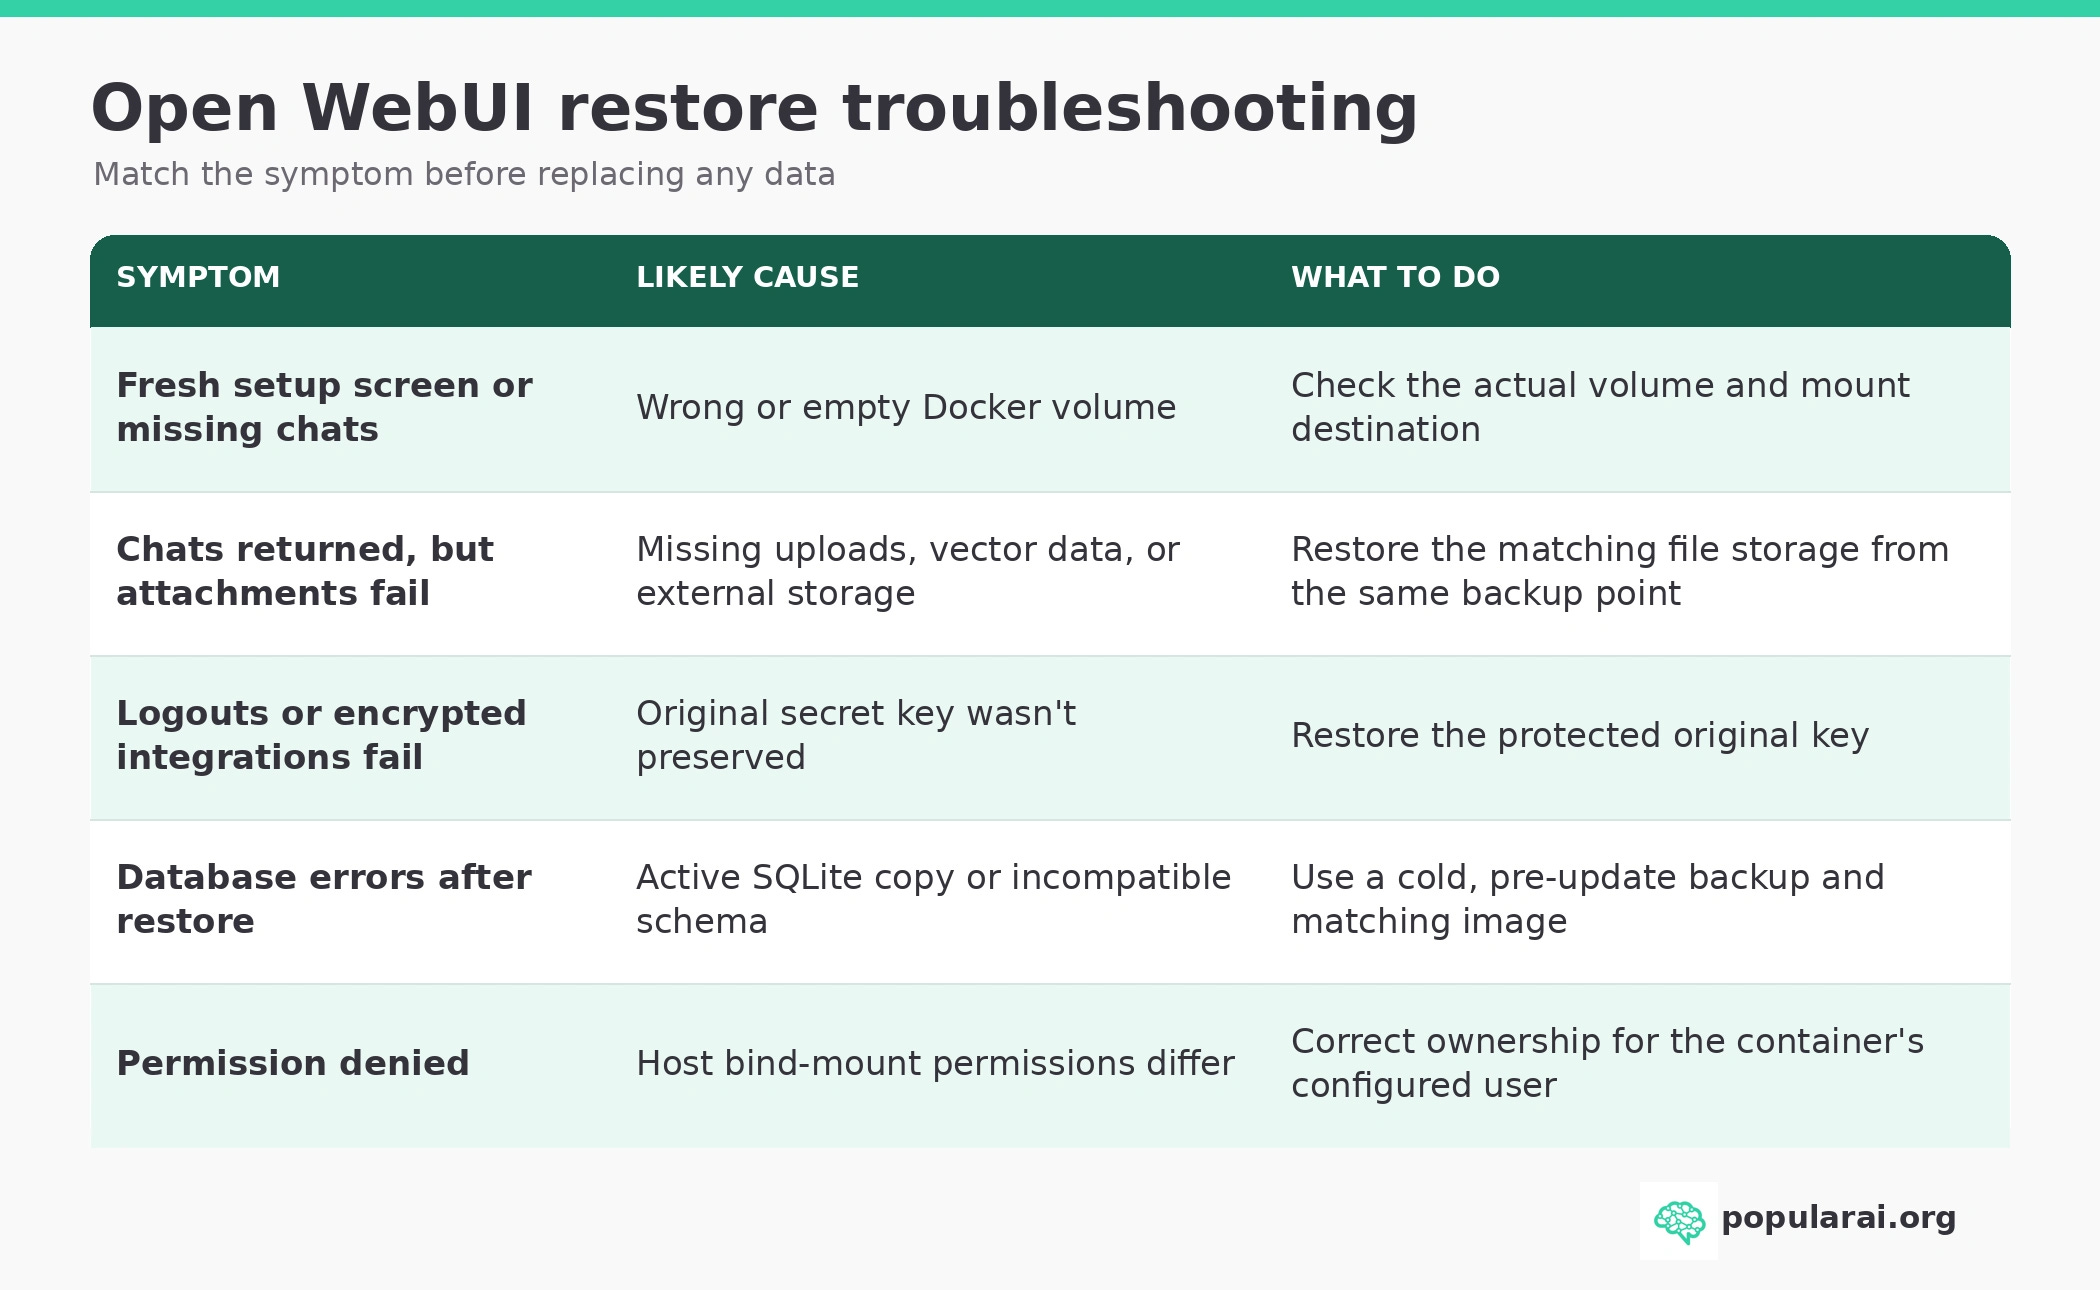
▪ A fresh setup screen or missing chats can mean the Docker volume is wrong or empty. Check the actual volume and its mount destination. If chats return but attachments fail, uploads, vector data, or external storage may be missing. Restore the matching file storage from the same backup point.
▪ Logouts or failed encrypted integrations can indicate that the original secret key was not preserved. Restore the protected original key. Database errors can come from an active SQLite copy or an incompatible schema. Use a cold, pre-update backup and the matching image.
For a permission-denied error after restoring a host bind mount, check ownership against the container’s configured user and correct it to match.
If chats seem to have vanished after a restart, first check whether the new container is attached to the wrong volume. A fresh setup screen does not, by itself, establish that the original database was deleted.
Roll back a failed update without overwriting new data
Keep the original image version, pre-update archive, deployment configuration, and secret together.
If an update runs a database migration, pulling the old image alone may not reverse its schema changes.
Your rollback checklist is:
Stop the failed deployment and preserve its current volume.
Find the pre-update archive, original image version, and matching secret key.
Restore that archive into another empty volume and recreate the previous Open WebUI version against it.
Verify chats, uploaded files, and settings before directing users to the restored instance.
Compare any conversations created after the backup before choosing which state to keep. Never extract an older archive over a live volume containing newer data.
Ollama models in a separate volume, an external PostgreSQL database, object storage, and remote vector databases are outside this single-volume procedure. Back them up independently and restore the connected services consistently.
Keep a restorable Open WebUI backup before the next update
Keeping an Open WebUI archive on the same disk as the only copy of your chats leaves both copies exposed to the same disk failure.
Before the next update, confirm that you have a chat JSON export, a readable full-data archive, the preserved deployment settings and original secret, and a restore procedure that runs in a separate volume. The archive, configuration, and key should describe the same installation and backup point.
Repeat the restore test after major storage or version changes. Use Popular AI’s local AI guide when planning the wider self-hosted setup, then make this backup and recovery check part of every Open WebUI update.
More on local AI:

Explore more from Popular AI:
Start here | Local AI | Builds & gear | Autonomy & policy | Fixes & guides | Popular AI podcast