



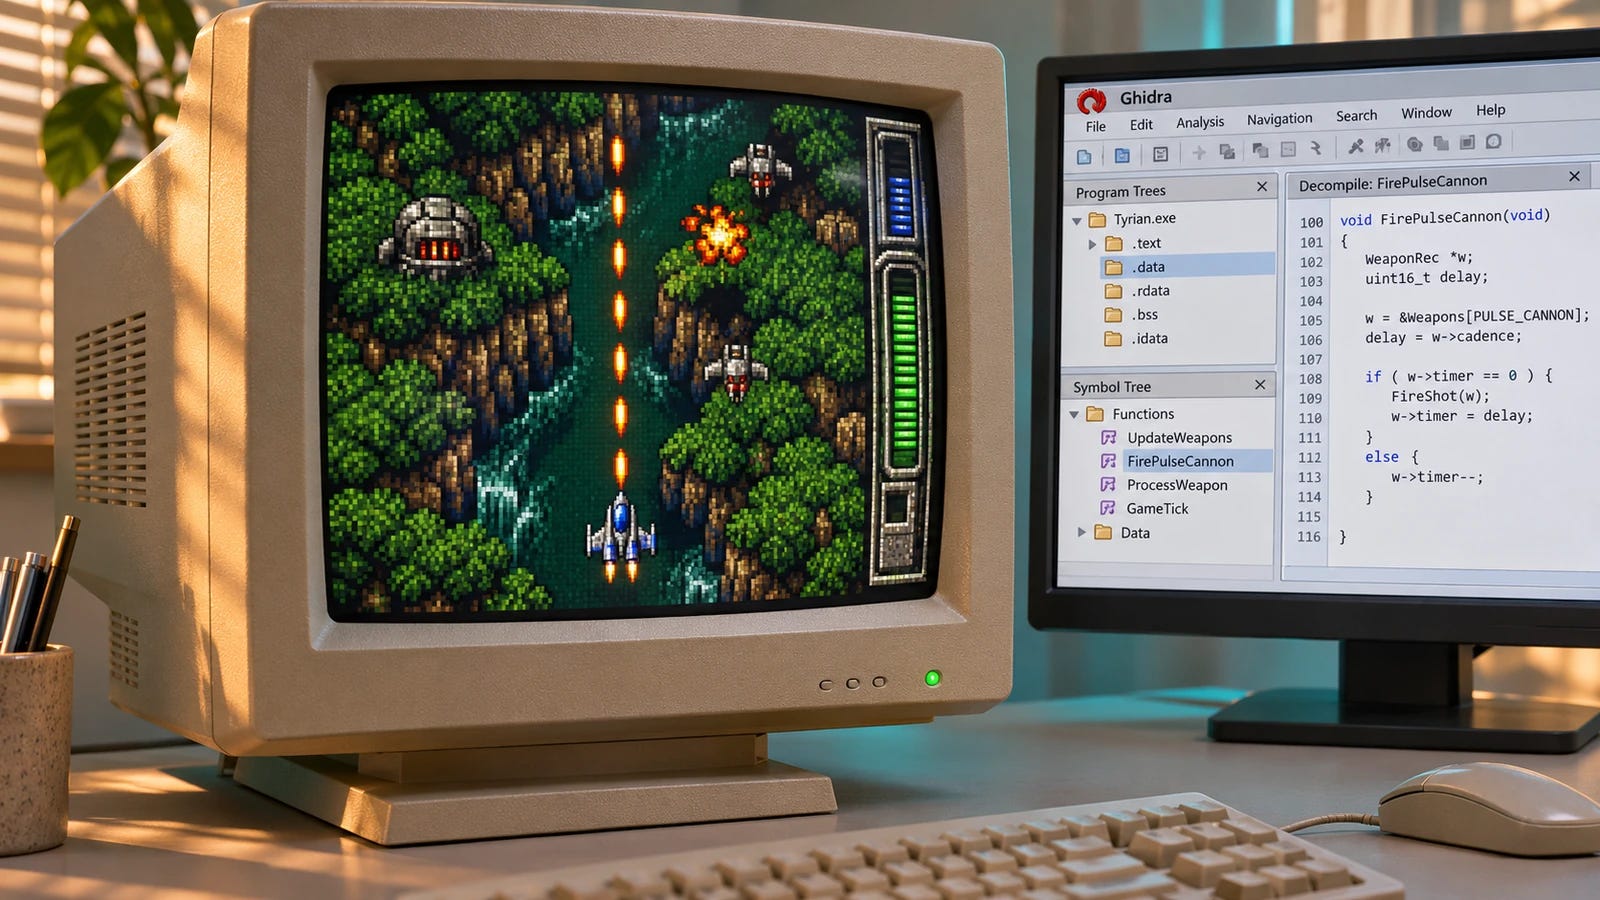
Use a local AI agent to replace Tyrian’s standard starting Pulse-Cannon with the Zica Laser, then compare how the weapon looks, fires, and sounds. You’ll analyze the Windows executable with Ghidra and Reverse Engineer Anything (REA), create a reversible weapon swap, and verify the files it changes.
Tyrian, the 1995 vertical-scrolling shooter, gives you a good first target. Pick a single front weapon in Episode 1 and you can see the effect of a successful change as soon as you hold down fire. You can follow the investigation through the agent’s tool results even if you haven’t read assembly before.
You run the setup, check what the agent did, and play both copies. The agent uses local Qwen inference to follow the loader and firing logic, map those findings to the right data record, and write a patcher and a short evidence report. Keep the original copy handy: it’s your comparison run, your source of known-good bytes, and your recovery path if the mod breaks.
1. The Windows reverse-engineering toolchain
Start with a Windows 11 x64 PC. Ollama runs Qwen3.8 27B on the GPU for local reasoning, coding, and tool use. OpenCode is the coding agent that runs commands and works with project files. REA connects OpenCode to binary-analysis tools, and Ghidra examines the machine code in OpenTyrian 2.1 and reconstructs pseudocode. Python and standard Windows utilities handle the reversible patch and verification.
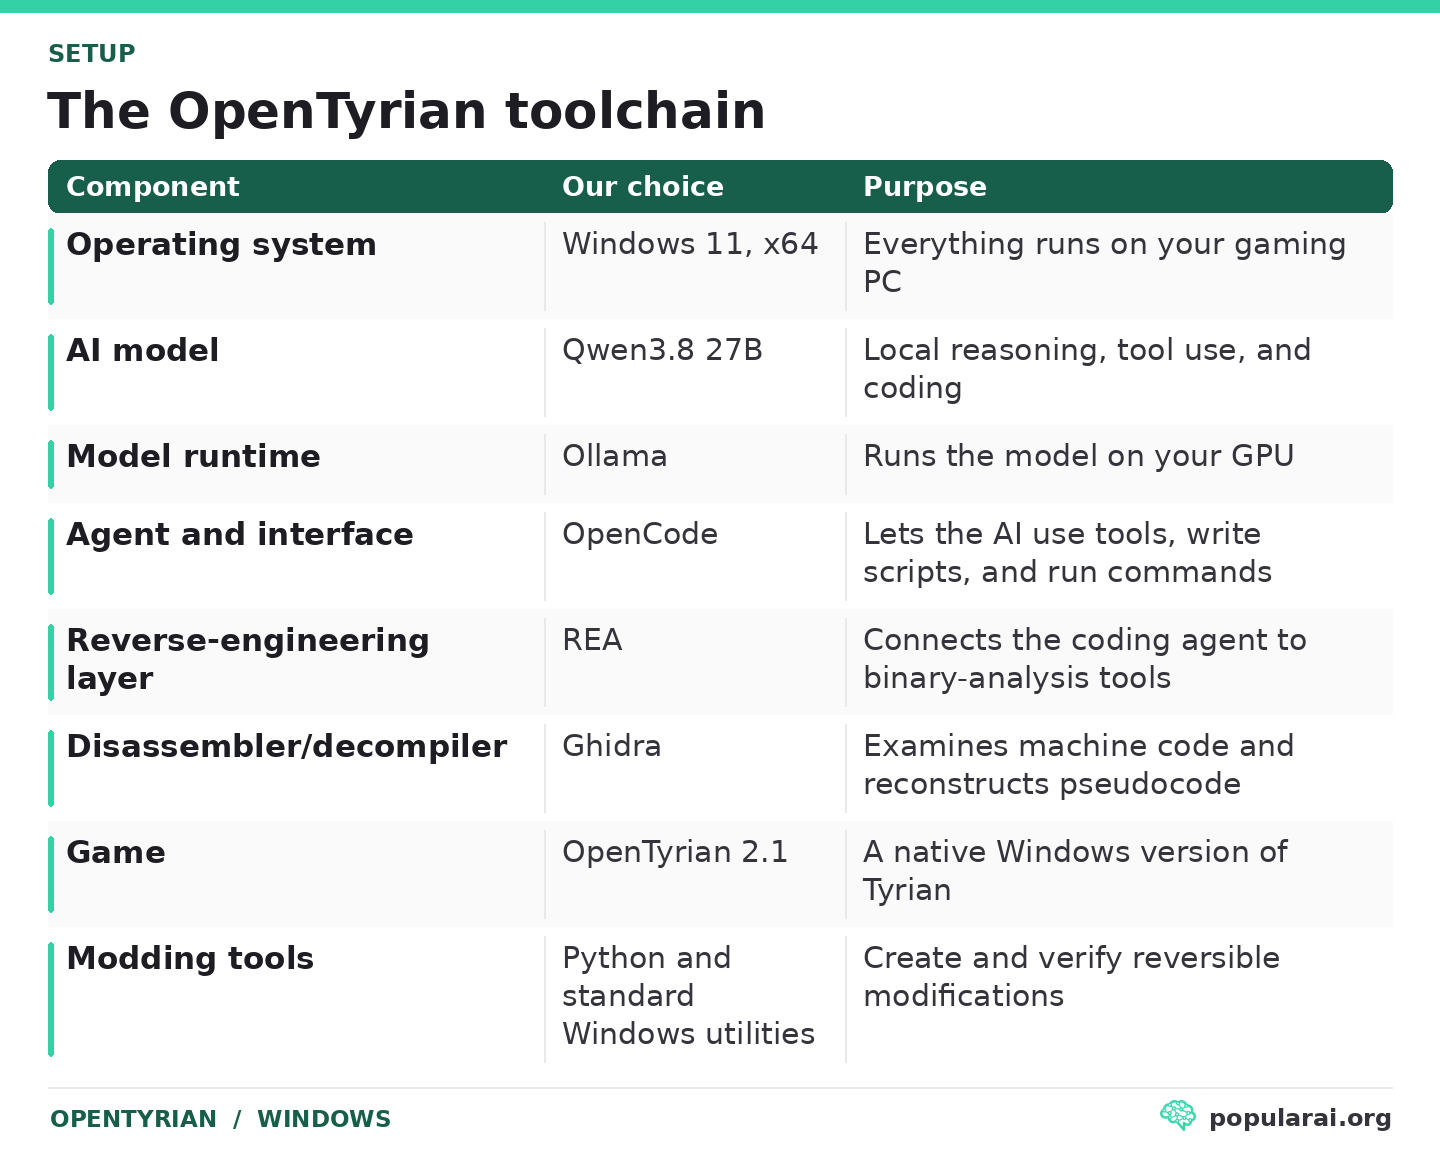
The main analysis and modding tools are open source, and the Qwen3.8 27B weights use the Apache 2.0 license.
▪ Why use OpenTyrian on Windows?
The original Tyrian runs as a DOS program. REA can analyze DOS MZ executables on supported hosts. For this native Windows workflow, use an x64 Windows PE executable within REA’s experimental Ghidra support boundary. The original TYRIAN.EXE falls outside that Windows boundary.
OpenTyrian is a native port of Tyrian that uses the freeware Tyrian 2.1 game data. Its Windows build gives us a suitable executable and the original gameplay data in the same package. Tell the agent to treat the executable as a black box and leave the C source alone during the investigation. Later, it can check its findings against the data format documentation. That sequence lets you practice the same analysis you would use on a game whose source was unavailable, with a reference to check your work afterward.
You can work from Windows PowerShell and keep model inference local throughout the tutorial. Ghidra runs headlessly through REA, so you can follow the evidence in OpenCode without having to learn Ghidra’s desktop interface first.
2. Choose the right hardware and local AI model
A reverse-engineering agent has to follow function calls, interpret decompiled pseudocode, and keep its place across a long sequence of tool calls. A model that can answer a short coding question may still lose track of which binary it opened or which record it has verified.
For this tutorial, aim for a single GPU with 24 to 32 GB of VRAM, such as an RTX 4090 or RTX 5090, plus 64 GB of system RAM and at least 30 GB free on an SSD. Treat those figures as a setup recommendation. A fast CPU helps with Ghidra’s analysis, while the GPU has to hold both the model and the working context you give it.
▪ Run Qwen3.8 27B locally
The Ollama build of Qwen3.8 27B supports tool calling and reasoning and downloads at about 18 GB. The model supports up to roughly 256K tokens of context, but that capacity and the download size measure different things. The context allocation adds runtime memory demand beyond the stored weights, so an 18 GB download gives you no guarantee that the 64K profile will stay fully on a 24 GB GPU.
Qwen3-Coder-Next is an 80B-parameter mixture-of-experts coding model with a roughly 52 GB default Ollama download. It makes more sense on a multi-GPU machine or one with a large memory pool. Start with Qwen3.8 27B on a 24 or 32 GB GPU.
We’ll ask Ollama for 65,536 tokens, then check what it actually allocates and where the model runs. If other apps are taking up VRAM or the model spills heavily onto the CPU, the 32K fallback below gives the agent a better chance of staying responsive. In that case, save findings after each stage and ask for specific tool results so the conversation has less to carry.
More on local AI hardware:


3. Install the local AI runtime
Set up local inference and test it from PowerShell before connecting it to OpenCode. This gives you a separate check for the model server if the agent later fails to see it.
3.1. Install Ollama
Run the Ollama Windows installer. Ollama should start its local inference service after installation.
Open Windows Terminal or PowerShell and type:
ollama --versionNext, confirm its local service is available:
Invoke-RestMethod http://127.0.0.1:11434/api/tagsA successful response shows the locally installed model inventory, which may initially be empty.
If PowerShell cannot recognize
ollama, reopen the terminal after installation. If the connection is refused, launch Ollama from the Start menu.
3.2. Download Qwen3.8 27B
In PowerShell:
ollama pull qwen3.8:27bOllama downloads the model to your computer.
Once installed, run a quick test:
ollama run qwen3.8:27bAsk:
Explain what a machine-code disassembler does in two sentences.A coherent answer confirms that Ollama can generate a response with the downloaded model.
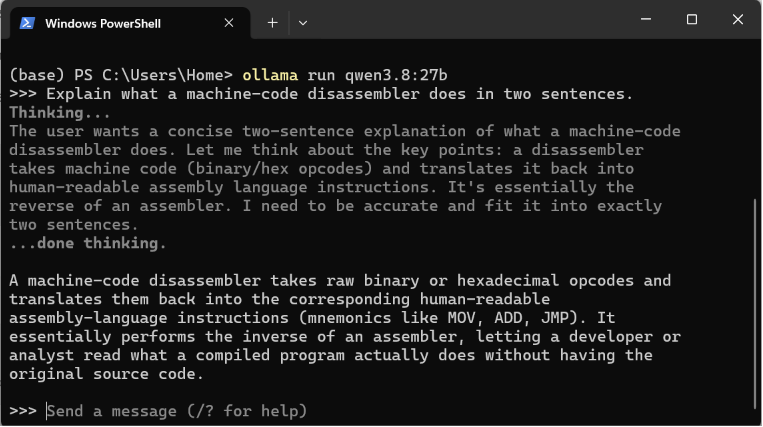
You’ll test tool calling separately. Type /bye to exit the interactive session.
3.3. Give the agent enough context
A local model can advertise a large maximum context window while the inference server uses a much smaller allocation. That can cause coding agents to forget earlier findings or fail during longer tool-driven tasks.
We’ll create a dedicated Ollama profile that requests the highest context available.
In PowerShell:
@'
FROM qwen3.8:27b
PARAMETER num_ctx 262144
RENDERER qwen3.5
'@ | Set-Content -Encoding utf8 "$HOME\tyrian-coder.Modelfile"

ollama create tyrian-coder -f "$HOME\tyrian-coder.Modelfile"
If you are running qwen3.8:27b with 16GB VRAM or less, try setting
PARAMETER num_ctxto32768. If you have 24GB VRAM available, settingPARAMETER num_ctxat65536should work fine. With 32GB VRAM or more, you should be able to run it withPARAMETER num_ctxat131072or, on higher-end GPUs,262144context.
This Modelfile creates a named model configuration called tyrian-coder, using the downloaded Qwen3.8 weights.
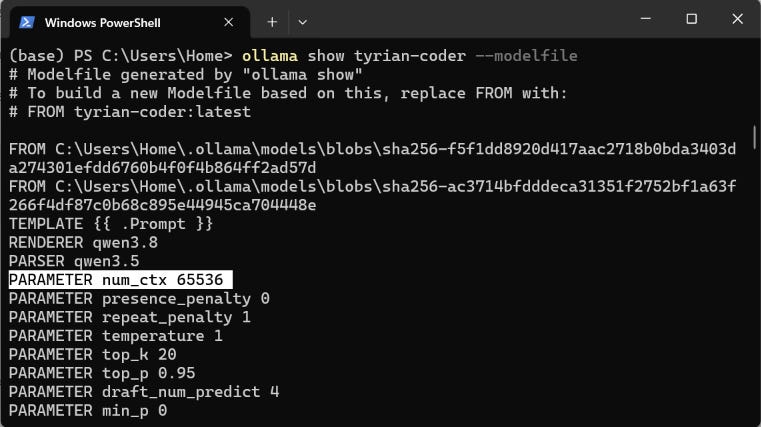
Verify it:
ollama show tyrian-coder --modelfileLook for PARAMETER num_ctx and verify that it is set at the number your Modelfile specifies:
Then load it:
ollama run tyrian-coder "Reply READY."Inspect the loaded model:
ollama psIdeally, the processor column should show full GPU execution rather than substantial CPU offloading. Check the reported context length here as well:
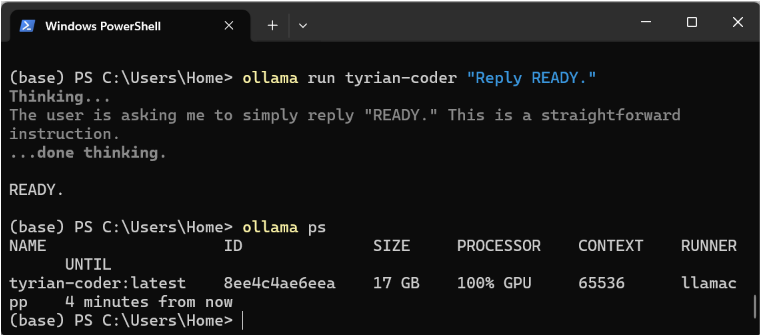
If you encounter out-of-memory errors, recreate the profile with
32768instead of65536.
Prioritize a responsive GPU-backed session. The agent has to read a tool result, reason about it, and make another request dozens of times. A slow response at each turn adds up, even when every individual query succeeds.
4. Install OpenCode, our local AI coding interface
OpenCode V2 gives the model a terminal, project file tools, and MCP access. That lets the model request a Ghidra operation, read what comes back, and write a patch script once it has evidence. The guide uses the terminal interface. You can open the same project in the graphical desktop app if you prefer.
4.1. Install Node.js
Use the Node.js download page to pick a supported release, or install the current LTS release through PowerShell and check the version afterward.
winget install --id OpenJS.NodeJS.LTS --exactClose and reopen PowerShell, then verify:
node --version
npm --version
For REA’s native Windows Ghidra provider, check your installed Node version against the Windows support guide linked above. Within the 24.x series the documented minimum is 24.22.1.
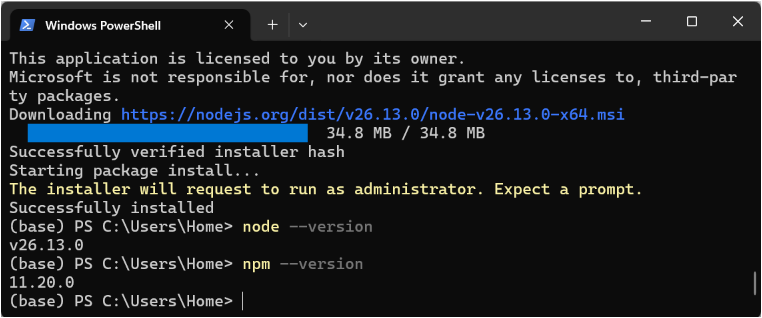
If the LTS install lands on an older patch release, update Node before setting up REA. A Node version that runs npm can still fall below the provider’s minimum.
4.2. Install OpenCode V2
Run the documented npm install from PowerShell. If npm’s postinstall cannot supply the Windows binary, download the standalone Windows x64 CLI from the same OpenCode V2 page, extract it to a directory on your PATH, and reopen PowerShell. Verify that the command resolves to V2 before creating the project configuration.
npm install --global @opencode/cliVerify:
opencode --versionLaunch OpenCode:
opencodeYou should see its terminal-based conversation interface.
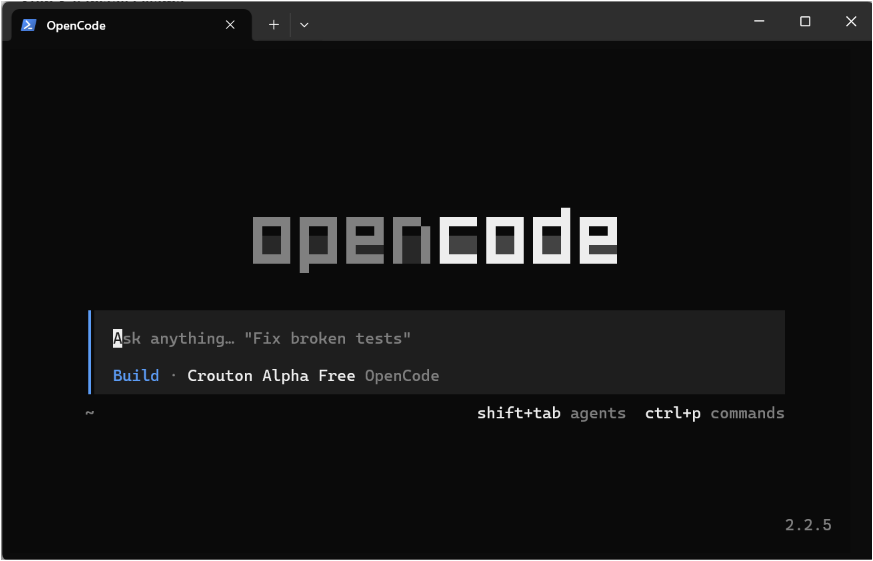
Use the project configuration and model selector documented for V2. If you’re coming from OpenCode’s earlier configuration reference, recheck the provider and MCP settings for the version you actually launched.


4.3. Connect OpenCode to Ollama
OpenCode V2 discovers completion models on the default local Ollama endpoint. Leave Ollama running while you configure the agent.
Start OpenCode and open its model selector:
/modelsSelect tyrian-coder:latest:
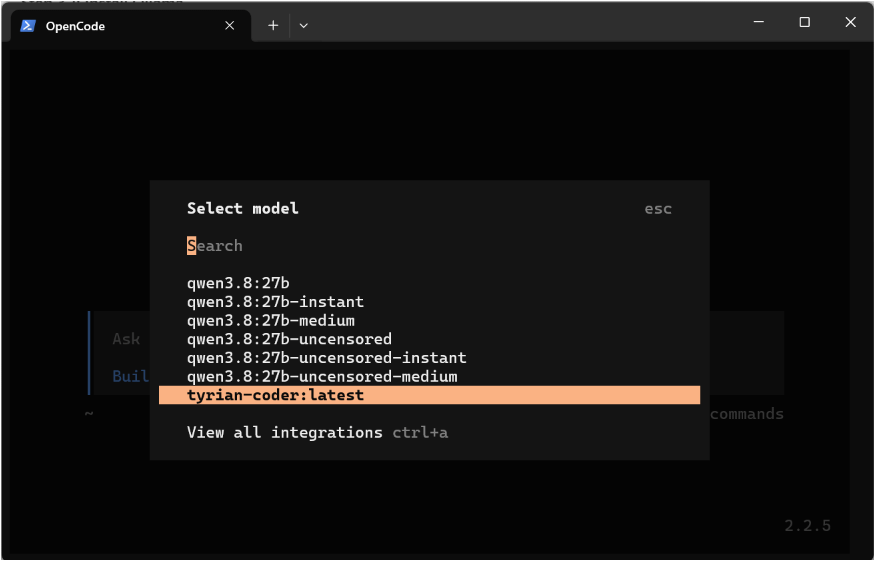
If it doesn’t appear immediately, check that Ollama is running and that ollama list shows the model. Reopen OpenCode to refresh detection.
You can also make it the default model for this project by creating an opencode.json configuration file, but we’ll do that in a later step.
Check that the selected model resolves to the local service at 127.0.0.1:11434 by opening another PowerShell tab and running:
Invoke-RestMethod http://127.0.0.1:11434/api/tagsIf Ollama is running correctly, PowerShell will display information about the locally installed models:

After the software and weights are on disk, this model can run inference without an internet connection. Keep the agent on local analysis tools during the experiment.


5. Install Ghidra
Ghidra is the NSA’s open-source reverse-engineering suite. Its decompiler represents machine instructions as C-like pseudocode. The agent can use that output to follow code from the data loader to the routine that decides when the next volley can fire. REA gives OpenCode access to Ghidra’s headless analysis.
5.1. Install Java
Ghidra needs a full Java Development Kit. Install the 64-bit Eclipse Temurin JDK 21 from a fresh PowerShell tab and verify that both the runtime and compiler commands work.
winget install --id EclipseAdoptium.Temurin.21.JDK --exactReopen PowerShell, then check:
java -version
javac -version
Both should work.

If javac is missing, locate your installed JDK under:
C:\Program Files\Eclipse Adoptium\You will need its exact folder path during REA setup.
5.2. Download Ghidra
Download Ghidra 12.1.4 from the official releases. The REA Windows guide identifies this build as verified. If you choose a different 12.1.x release, adjust the paths throughout the guide and check it with rea doctor.
Extract it to:
C:\Tools\The resulting directory should resemble:
C:\Tools\ghidra_12.1.4_PUBLIC\Inside it, confirm that this file exists:
support\analyzeHeadless.bat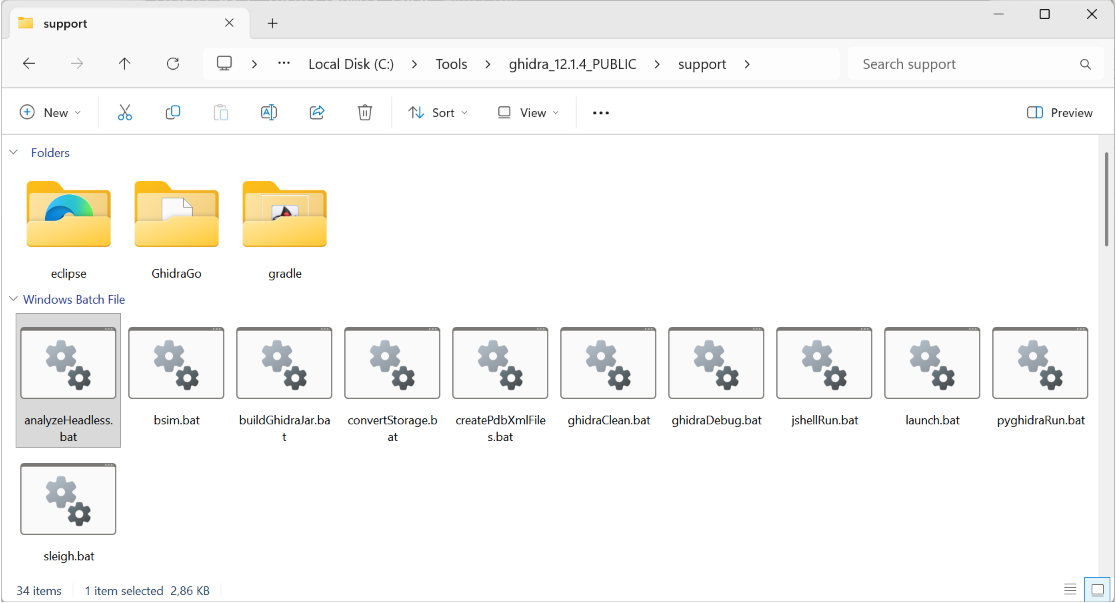
You don’t have to open Ghidra’s graphical interface. REA uses Ghidra’s headless analysis facilities.
If the launcher is missing after extraction, check the archive layout against the Ghidra installation instructions before setting the provider path.
6. Install Reverse Engineer Anything and connect it to OpenCode
Reverse Engineer Anything connects coding agents to reverse-engineering tools through the Model Context Protocol (MCP). In this setup, you give OpenCode a task and it runs the Qwen model through Ollama. When the model requests a binary-analysis operation, OpenCode invokes the REA MCP server. REA manages the session, calls Ghidra headlessly, and returns evidence such as strings, cross-references, and decompiled functions.
REA’s Ghidra integration on Windows is read-only. Use it to investigate the baseline executable, then let OpenCode’s file and terminal tools create a reversible patch for the working copy. The verification report should identify every changed file and explain whether the chosen weapon-swap method changes game data, executable code, or both.
REA connects AI coding agents to Ghidra to inspect compiled executables and recover readable code.
6.1. Install REA
Open PowerShell from your home directory:
Set-Location $HOME
npm install --global rea-agents
Verify:
rea --version6.2. Tell REA where Ghidra and Java are installed
Set the exact paths in PowerShell. Adjust these to match your machine.
$env:GHIDRA_INSTALL_DIR = "C:\Tools\ghidra_12.1.4_PUBLIC"
$env:JAVA_HOME = "C:\Program Files\Eclipse Adoptium\jdk-21.0.x-hotspot"
The folder paths above are illustrative. Replace them with your actual Ghidra and JDK directories, and pay extra attention to getting the installed version number correct.
Check both paths:
Test-Path "$env:GHIDRA_INSTALL_DIR\support\analyzeHeadless.bat"

Test-Path "$env:JAVA_HOME\bin\javac.exe"
Both should return True before you continue.

Now let REA inspect the installation:
rea doctor --provider ghidra --jsonThe report should identify a usable Ghidra provider.
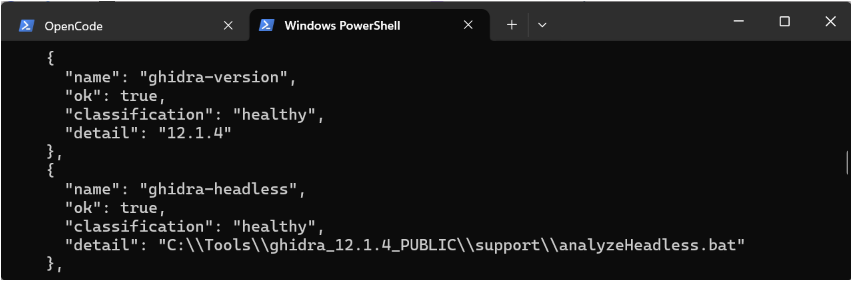
If it reports a missing Java executable, unsupported Ghidra version, or missing native decompiler, fix the reported prerequisite before continuing.
6.3. Register REA with OpenCode
With the environment variables still set in the same PowerShell session, run:
rea setup --client opencodeREA presents a setup plan. Review the directories, environment variables, MCP registration, and workflow instructions it proposes.
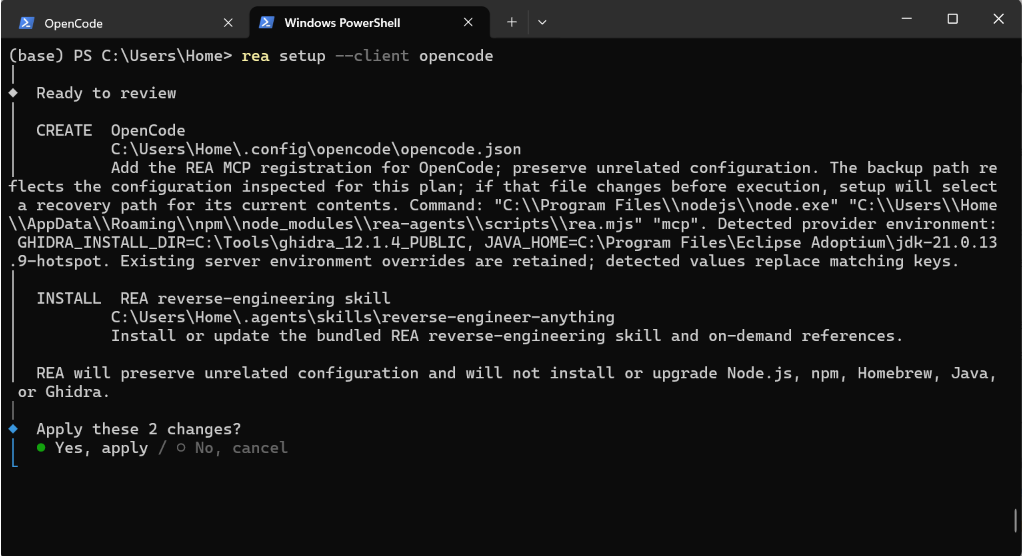
Approve the appropriate configuration.
REA can register its MCP server for OpenCode V2 and install its investigation skill. Close any existing OpenCode session, then start it from PowerShell with the same Java and Ghidra paths set. If you use a new terminal, set those variables there first unless you have configured them persistently.
6.4. Verify the MCP connection
In PowerShell:
rea doctor --client opencode --jsonThen check the client itself:
opencode mcp listYou should see a connected server named rea.

This confirms the agent-side connection. We’ll verify a real Ghidra analysis shortly.
If you only see a grouped tool interface, check how OpenCode exposes MCP operations in Code Mode. The connection check tells you that the server is present. The first-look exercise below checks whether the model can actually use it to get evidence from Ghidra.
7. Download Tyrian and prepare a safe workspace
Download the Windows x64 ZIP for OpenTyrian v2.1.20260913, the September 2026 release used in this walkthrough. The release archive includes the freeware Tyrian 2.1 data. Choose x64 for the Windows and REA setup described here.
7.1. Separate the baseline, mod, and evidence
We’ll keep an untouched baseline, a playable modded copy, and a workspace for the agent’s scripts and discoveries.
Open PowerShell and run:
$root = "C:\TyrianRE"

New-Item -ItemType Directory -Force `
  "$root\baseline", `
  "$root\modded", `
  "$root\tools", `
  "$root\findings" | Out-Null
Extract the downloaded OpenTyrian ZIP into C:\TyrianRE\baseline.
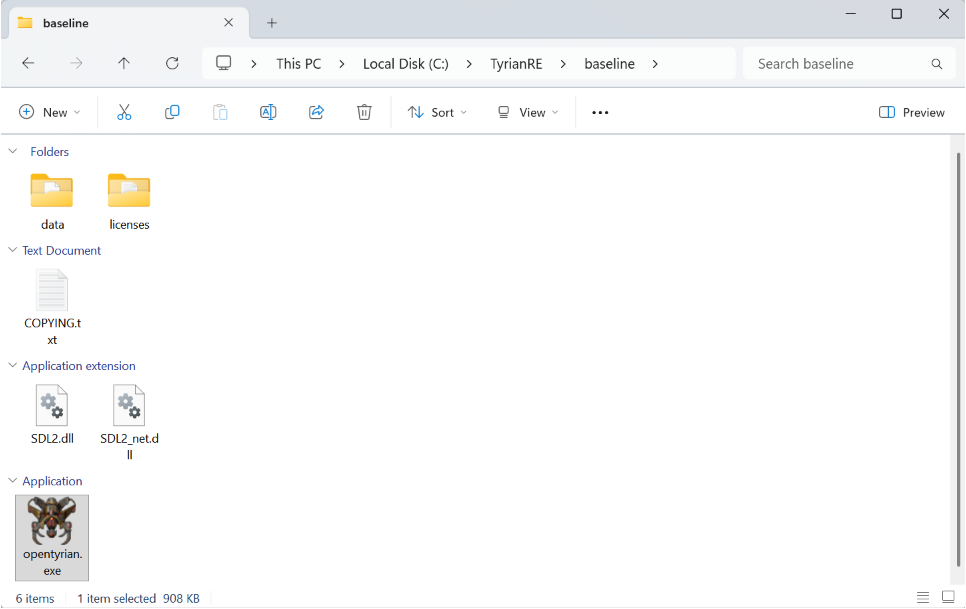
Ensure the game executable ends up directly at:
C:\TyrianRE\baseline\opentyrian.exeIf the ZIP contains an extra enclosing directory, move its contents up one level.
Now, in PowerShell, make a complete working copy:
Copy-Item "C:\TyrianRE\baseline\*" `
  -Destination "C:\TyrianRE\modded" `
  -Recurse -Force
Inside C:\TyrianRE, baseline holds the original installation and modded holds the playable copy the agent can change. The other two folders, tools and findings, can stay empty for now. Later in the tutorial, our AI agent will automatically fill them with the files it creates while investigating and modifying the game. You won’t need to write any of that code yourself.
Keeping the baseline and modded directories separate gives you an original file for byte comparisons and a working game you can restore without downloading the archive again.
7.2. Verify the installation
Check the files:
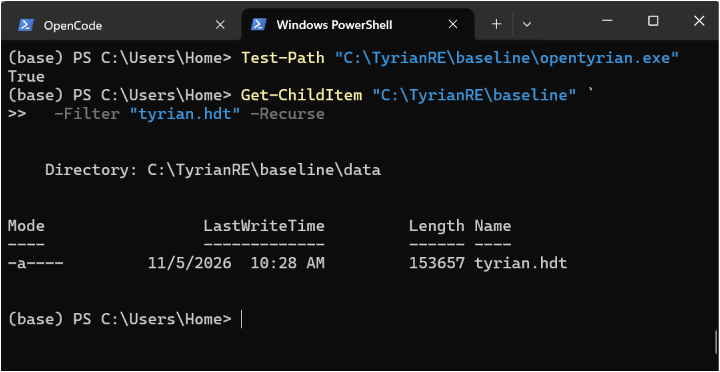
Test-Path "C:\TyrianRE\baseline\opentyrian.exe"

Get-ChildItem "C:\TyrianRE\baseline" `
  -Filter "tyrian.hdt" -Recurse
The first command should return True. The second should locate a game data file named tyrian.hdt.
Now record the executable’s original checksum:
Get-FileHash `
  "C:\TyrianRE\baseline\opentyrian.exe" `
  -Algorithm SHA256
A SHA-256 hash is a fingerprint of the file. It allows us to confirm exactly which version the agent analyzed and whether it was changed afterward.
8. Tell OpenCode which files it can modify
Before we let our AI agent investigate Tyrian, we’ll give it a few ground rules. We want the agent to examine the original game without accidentally changing it, and to keep its experiments inside our project folder.
OpenCode supports a special file called AGENTS.md. It contains instructions for the AI agent. When you start OpenCode inside a project folder, it automatically reads that project’s instructions. You don’t need to paste them into every conversation.
8.1. Create the instructions file
Open PowerShell and enter:
notepad C:\TyrianRE\AGENTS.mdIf Notepad asks whether to create the file, click Yes.
Copy the following text into Notepad:
# Tyrian reverse-engineering project

You are helping me reverse-engineer and modify Tyrian
using REA and Ghidra.

Follow these rules throughout this project:

1. The baseline folder contains the original game.
   You may read files in this folder, but never
   modify, delete, or overwrite them.

2. The modded folder contains the copy of the game
   that we will experiment with. You may modify
   files here.

3. Save any programs or scripts you create in
   the tools folder.

4. Save your reverse-engineering findings, notes,
   and reports in the findings folder.

5. Use the local AI model and local analysis tools.
   Do not send game files or analysis data to cloud
   AI services.

6. Do not download or execute unknown programs
   without asking me first.

7. Ask for my approval before deleting files,
   changing anything outside C:\TyrianRE, or
   performing potentially destructive operations.

8. Use REA and Ghidra to investigate the compiled
   game. Do not consult OpenTyrian's public source
   code to discover the solution.

9. Verify your modifications and explain what
   changed. Never claim a test succeeded unless
   you actually performed it.
Save the file and close Notepad.
That’s it. The next time OpenCode starts inside C:\TyrianRE, it will automatically load these instructions. This behavior is documented in OpenCode’s project instructions guide.
8.2. Make OpenCode ask before making potentially risky changes
Instructions tell the AI what we want, but they aren’t a technical security barrier. OpenCode also has a permissions system that controls when it must ask for approval.
Open our existing configuration:
notepad C:\TyrianRE\opencode.jsonCopy-paste these contents into the file:
{
  "$schema": "https://opencode.ai/config.json",
  "model": "ollama/tyrian-coder:latest",
  "permissions": [
    {
      "action": "edit",
      "resource": "baseline/*",
      "effect": "deny"
    },
    {
      "action": "shell",
      "resource": "*",
      "effect": "ask"
    },
    {
      "action": "external_directory",
      "resource": "*",
      "effect": "ask"
    },
    {
      "action": "webfetch",
      "resource": "*",
      "effect": "deny"
    },
    {
      "action": "websearch",
      "resource": "*",
      "effect": "deny"
    }
  ]
}
Save and close Notepad.
These settings tell OpenCode to block its built-in file-editing tools from modifying baseline, ask before executing terminal commands or accessing locations outside the project, and disable its built-in web search and web-fetch tools.
The shell-command approval is especially important. A command executed through PowerShell can still modify the original game if you approve it. The baseline restriction on OpenCode’s file-editing tools does not, by itself, protect against every possible shell command or external MCP tool.
The settings above use OpenCode V2’s current permissions format, which differs from examples written for older versions.
8.3. Start OpenCode
In PowerShell, enter:
cd C:\TyrianRE
opencode
That’s all you need to do. OpenCode reads AGENTS.md automatically, and the permissions in opencode.json are applied to the project.
For a quick check, you can ask the agent:
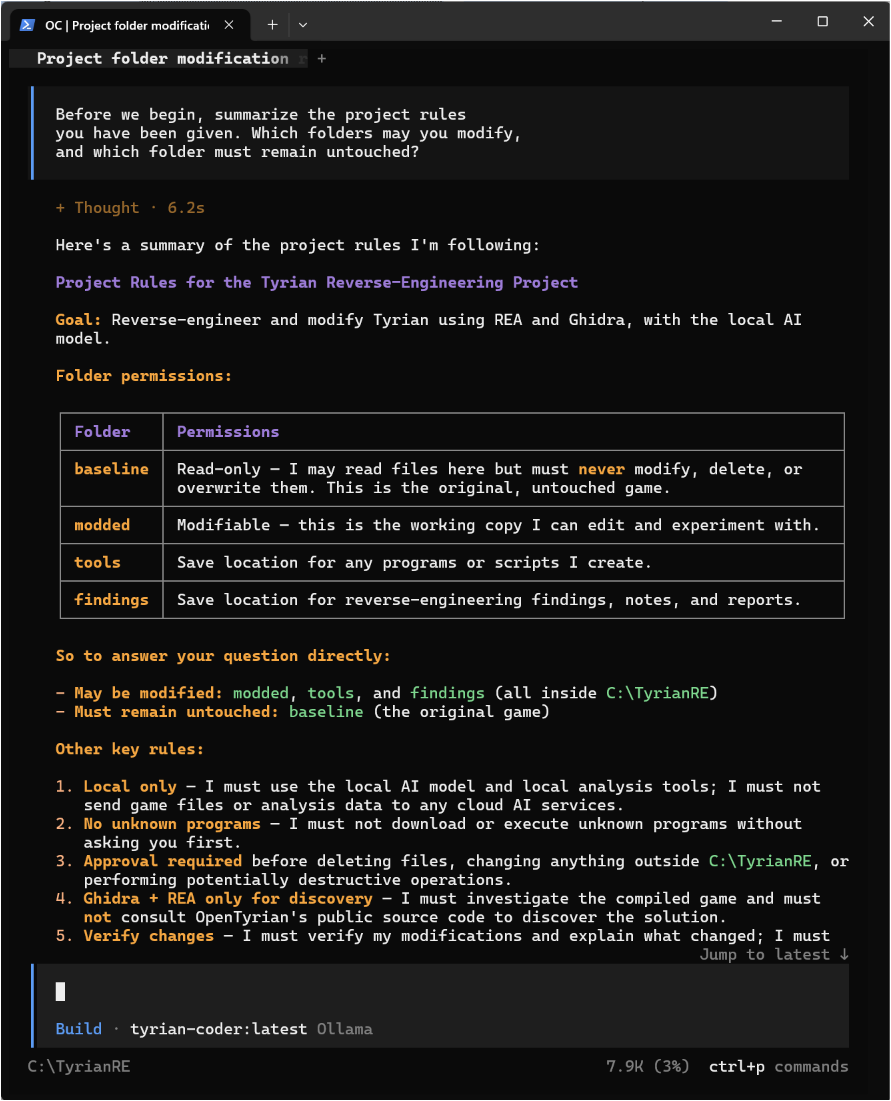
Before we begin, summarize the project rules
you have been given. Which folders may you modify,
and which folder must remain untouched?
It should correctly identify baseline as the original, modded as the working copy, and tools and findings as the places to store its work.
When OpenCode later asks permission to run a command, review what it intends to do. Approve ordinary analysis commands and clearly understood modifications to the working copy. Reject commands that unexpectedly modify the baseline, access unrelated folders, or download software.
Close OpenCode by typing /exit.
You can now continue to the first REA and Ghidra test.
9. Play the original game once
Back in PowerShell, run the baseline game:
Set-Location "C:\TyrianRE\baseline"
.\opentyrian.exe
Start a new single-player Full Game in Episode 1 using the standard Pulse-Cannon front weapon.
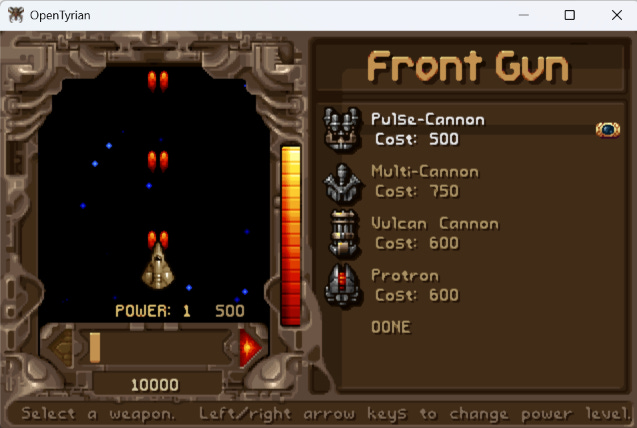
Watch the Pulse-Cannon’s projectile appearance and firing pattern, listen to its sound, and check the generator during sustained fire. Record a short clip with audio so you can compare this baseline with the Zica Laser replacement later.
Use the same starting equipment and weapon power level for the later comparison. A screenshot or a short video of continuous firing can help establish a baseline.
Close the game before proceeding.
The two copies can share settings and saves under %APPDATA%\OpenTyrian. This release can use the executable’s directory for settings and saves if opentyrian.cfg is already present there. After we modify the game, for a straightforward comparison, start a fresh Episode 1 game in each copy and match the difficulty, equipment, power level, and starting generator.
Tyrian's original gameplay provides a visual reference before testing our Pulse-Cannon and Zica Laser swap.
10. Give OpenCode access to the project
Return to PowerShell:
Set-Location "C:\TyrianRE"Now launch OpenCode from that directory:
opencodeAlternatively, open the folder in OpenCode Desktop.
The project directory is important because the agent will be able to read the game files, create scripts in tools, and write its investigation results to findings.
Review OpenCode’s permission prompts if/when they appear. These project boundaries are instructions to the agent. Check the working directory and target paths on write or execution requests, especially when PowerShell commands use relative paths.
11. Test whether the AI can actually operate Ghidra
Before asking the model to reverse-engineer game mechanics, we’ll give it a smaller assignment.
Paste this into OpenCode:
We are working locally on Windows in C:\TyrianRE.

Use the connected REA MCP server to inspect
C:\TyrianRE\baseline\opentyrian.exe
with provider_id ghidra.

First check binary_session and provider availability.
Then call open_binary, request a binary_overview,
and identify the executable architecture, entry
point, imported libraries, and a few significant
strings.

Use actual REA tool calls. Do not guess from
filenames or prior knowledge.

Do not examine the public source code.
Do not modify any files.

Save a concise report in findings\first-look.md
including the file SHA-256 and observed
Ghidra/REA evidence.

Close the binary session when finished.
11.1. Check the first Ghidra tool results
The agent should discover the REA tools, open the executable with Ghidra, and retrieve analysis results.
You should see actual tool activity, rather than a generic explanation of how Ghidra works.
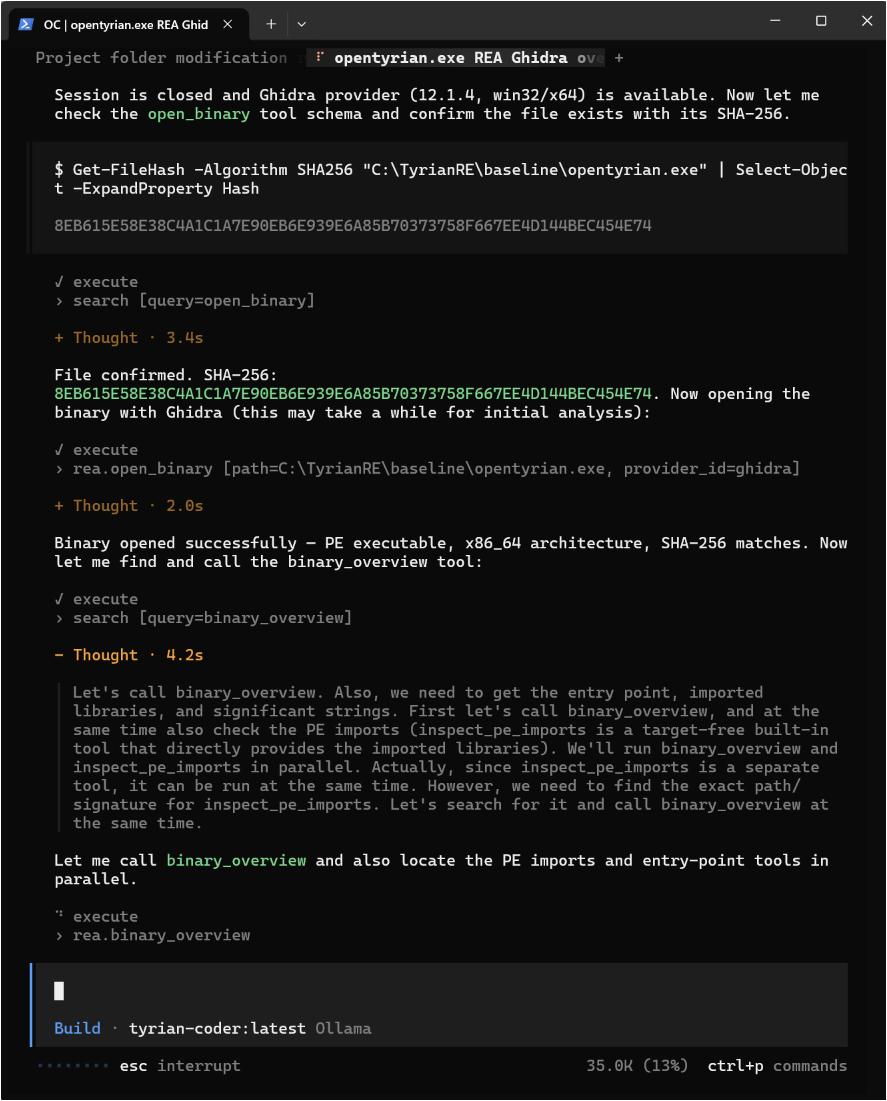
REA’s operations include open_binary, binary_overview, search_strings, function analysis, cross-references, and memory inspection.
Ghidra may spend some time importing and analyzing the executable on the first query. Opening a binary through REA selects the target; it doesn’t necessarily mean the analysis engine has completed initialization.
Open findings\first-look.md and compare it with the visible tool results. It should identify the provider, executable, architecture, entry point, and at least a few imports or strings returned by Ghidra. The prompt’s final report is the intended output file. Keep the game directories unchanged during this check.
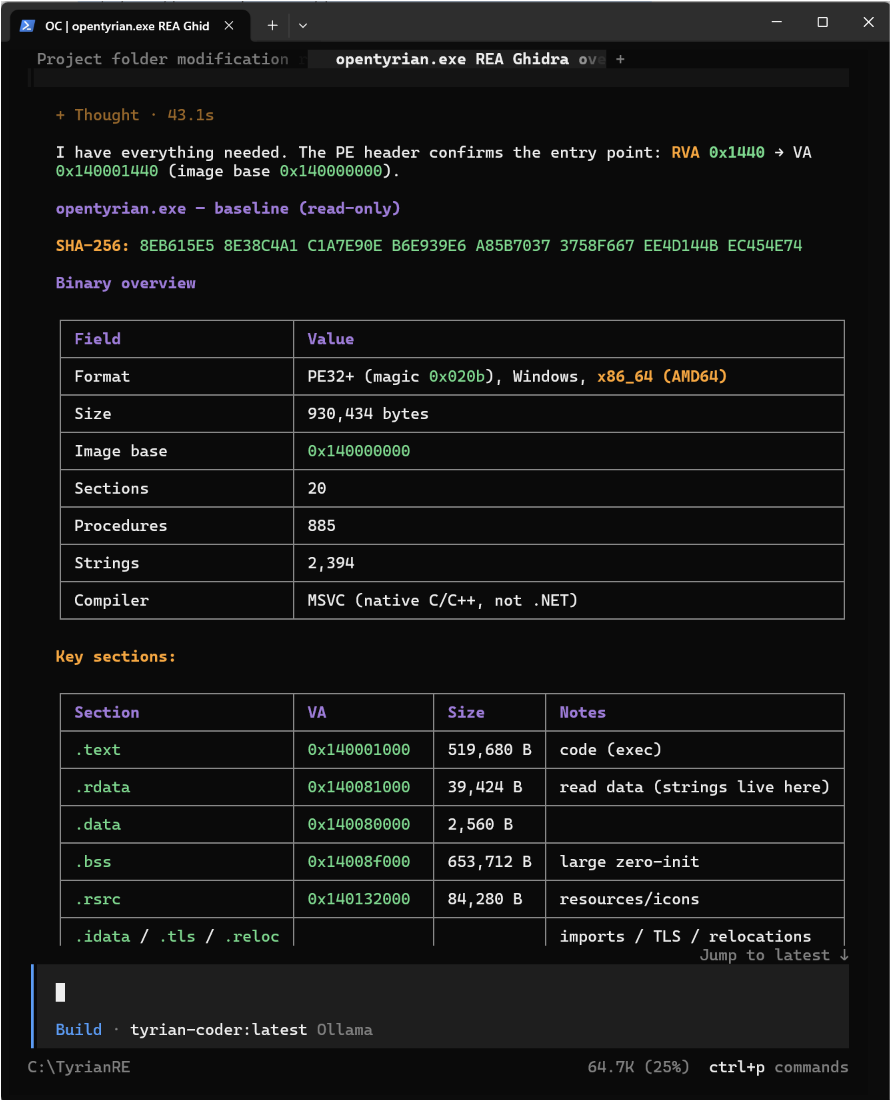
If the agent merely explains what Ghidra could do, tell it:
I don’t want a simulated analysis. Invoke the installed REA tools. If a tool is unavailable, report the actual error and its proposed fix.Do not proceed until a genuine analysis succeeds. You may have to tell the agent to continue what it was doing if responses exceed the token limit.
Ghidra reconstructs useful pseudocode and references from compiled binaries, which the local AI agent can investigate through REA.
12. Replace the Pulse-Cannon with the Zica Laser
Our first idea was to make the Pulse-Cannon fire faster. In practice, that was a disappointing demonstration. A small change in firing frequency was difficult to judge once the screen filled with enemies and projectiles.
We gave the agent a more obvious objective. Replace the standard Pulse-Cannon with the game’s existing Zica Laser. In our run, the weapon looked, fired, and sounded noticeably different. You could recognize the change as soon as you pressed fire.
That gives us a better first reverse-engineering project. The agent has to identify two existing weapons, trace how the game selects their behavior, and make the starting weapon use the Zica Laser. The result gives you something clear to compare in the baseline and modified copies.
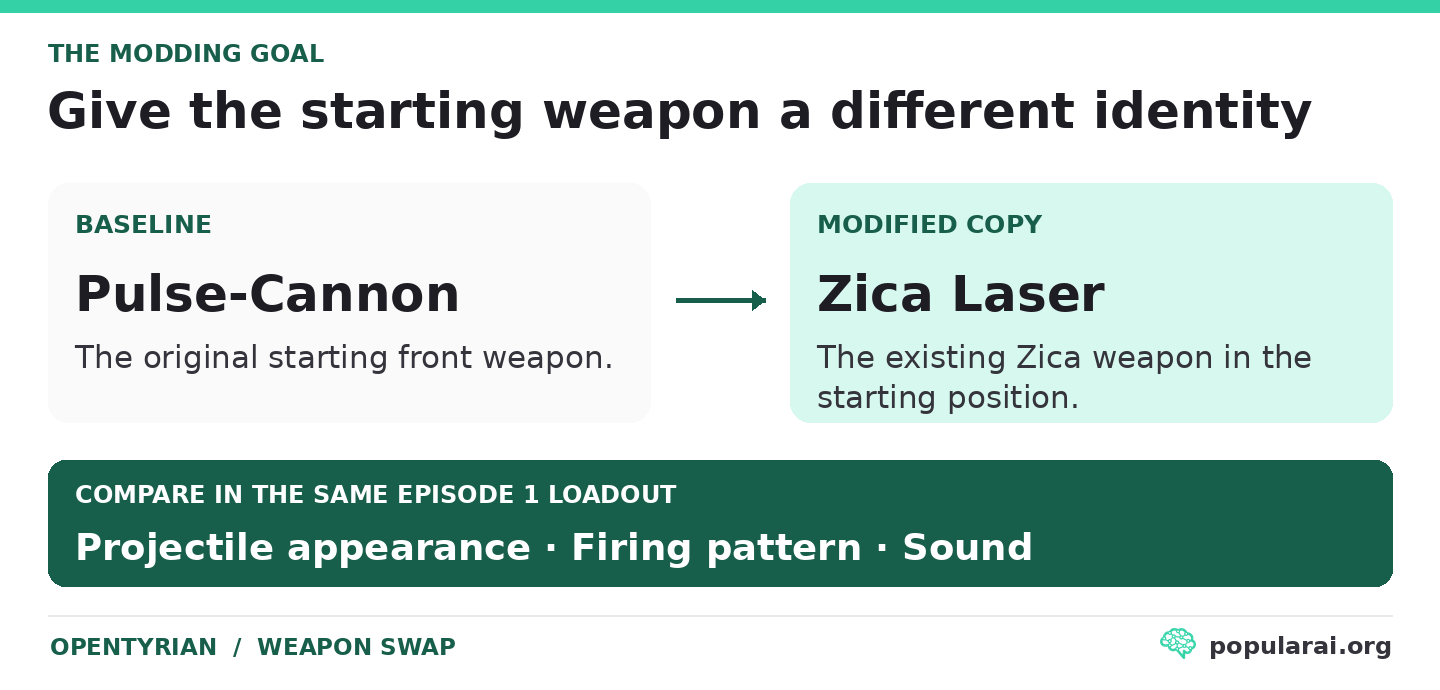
12.1. Trace how the game selects a weapon
OpenTyrian’s weapon-port records refer to shot patterns for different power levels and firing modes. Those patterns contain timing, projectile graphics references, and a sound field. Power use is recorded in the weapon-port definition.
The agent needs to connect the player’s equipped front weapon to those records. Finding the text “Zica Laser” is a starting point. It still has to establish which definition the game uses, how that definition leads to the shots on screen, and where the firing sound comes from.
Ask it to trace both the original Pulse-Cannon and the Zica Laser before proposing a patch. The change should reproduce the existing Zica weapon’s appearance, firing behavior, and sound in the starting front-weapon position. Let the evidence determine whether that means changing the equipped weapon selection or the data it resolves to.
12.2. Give the swap a clear acceptance test
Start a fresh Episode 1 game in each copy, with the same difficulty, ship, starting power level, and audio settings. Fire in the same part of the opening level.
The baseline should still produce the ordinary Pulse-Cannon. In the modified copy, compare the projectile appearance, firing pattern, and sound. Check that the weapon can fire, that the generator behaves sensibly, and that the game still loads and plays.
Keep a short recording with audio from each run. Those clips make the result much easier to assess than trying to remember whether a familiar gun fired slightly faster.
13. Give OpenCode the Zica Laser assignment
Once the first-look exercise confirms that REA and Ghidra work, give the agent a complete weapon-swap assignment.
The model should investigate the executable, resolve the weapon definitions, and produce the patch. Your part is to review its evidence and compare the two playable copies.
Paste this into OpenCode.
Work locally in C:\TyrianRE with the connected REA MCP server
and Ghidra.

Goal: Replace the standard starting Pulse-Cannon with the game's
existing Zica Laser in a fresh Episode 1 story game. The modified
front weapon should use the Zica Laser's projectile appearance,
firing behavior, and sound.

Start with the baseline loadout and power level. Use actual REA
calls to trace weapon selection, the Pulse-Cannon and Zica Laser
definitions, their shot-pattern references, and the code that
uses them. Leave the public C source alone during discovery.
Use the tyrian.hdt format reference afterward as a cross-check.

Record the analyzed build, file paths, SHA-256 hashes, relevant
code addresses, weapon identifiers, and record mappings in
findings\analysis.md. Derive all identifiers and offsets from
this build. Do not guess them.

Choose the smallest verified change that achieves the full swap.
Explain whether it changes player equipment selection, weapon
data, executable code, or a combination. Check for shared records
and effects on other weapons. Preserve the existing Zica Laser
definition and unrelated gameplay wherever the chosen method
allows. Report any unavoidable wider effects before applying it.

Create tools\patch_tyrian.py and a verification script. Preserve
the baseline and modify only the working copy under modded.
Check expected original bytes and structure before writing.
Reject unexpected input and handle an already-patched copy
without applying the modification twice. Provide an undo path.

Save a patch manifest under findings with the exact changed files,
computed offsets, old and new values, and byte differences.
Verify the baseline is intact and the differences match the
manifest. Report whether the executable changed and why.

Give me the command to launch the modified copy and a short manual
test comparing the Pulse-Cannon and Zica Laser at the same starting
power level. Ask me to compare appearance, firing pattern, and
sound, then check energy use and normal gameplay.

Write only under modded, tools, and findings. Ask before destructive
or out-of-project actions. If evidence is missing, report the
specific gap before patching. Separate verified file changes from
gameplay results I still need to check.

Close the Ghidra binary session when finished.
13.1. Ask for the evidence behind the replacement
The report should explain how the game gets from the starting loadout to the weapon it actually fires. Have the agent show where it identified the Pulse-Cannon, where it identified the Zica Laser, and which part of that selection path the patch changes.
If the proposed patch only changes a weapon name or a firing-delay value, send it back to the stated objective. You should be able to connect the modification to the Zica projectile pattern and sound before launching the game.
13.2. Why the prompt is this specific
Each stage gives you something concrete to inspect. The binary trace explains where the game gets the timing value. The record mapping explains which bytes belong to the equipped weapon. The manifest shows what the script actually changed. If the file fails the layout or original-value check, stop and revisit the mapping with a clean copy.
14. Check that the agent found the complete weapon behavior
Start with the loader and the weapon selection path. The agent should show actual REA results connecting the compiled program to its weapon data, then resolve the front weapon used by the fresh Episode 1 loadout.
Next, have it identify the Zica Laser’s corresponding definition and shot patterns for the power level you are testing. Ask which references account for projectile appearance, firing behavior, and sound, and how the patched selection will reach them.
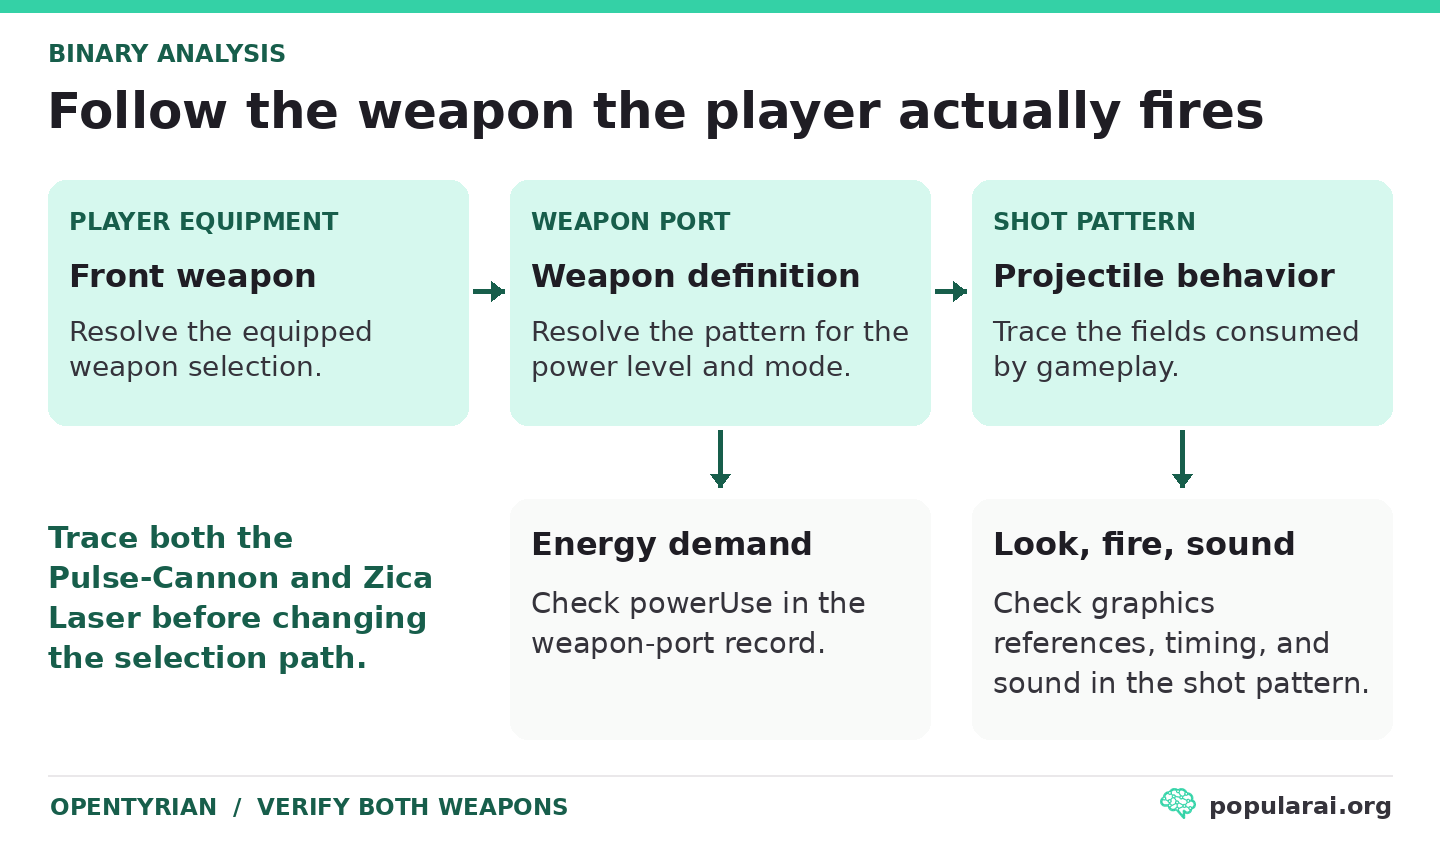
14.1. Check the relationships between records
The name displayed in a menu can help identify an entry, but gameplay follows the weapon and pattern references. Verify those references through the compiled program.
A swap can also expose differences in energy use or upgrade behavior. Ask the agent to record what the proposed method does to the starting power level and generator demand. Any adjustment beyond the weapon replacement should be identified separately in the manifest.
If the patch changes a shared record, the report should identify the other weapons, modes, or power levels that use it. Review those effects before accepting the modification.
14.2. If the agent gets stuck
Bring it back to the two weapons and the selected loadout.
Continue from findings\analysis.md and the existing REA evidence.
Do not repeat completed investigation work.

Resolve the baseline front-weapon selection for a fresh Episode 1
story game, then identify the Pulse-Cannon and Zica Laser records
and their shot-pattern references at the tested power level.

Trace how those references reach projectile graphics, firing
behavior, and sound. Check energy use separately.

Explain the smallest verified change that makes the starting
front weapon behave as the existing Zica Laser.

Write the confirmed mapping and remaining uncertainty to the
report before editing files. Do not settle for renaming the
weapon or changing its firing interval.
Once the mapping is complete, the patcher should be able to check the original state and explain each proposed change. A report that jumps from a weapon-name match to a guessed offset needs more investigation.
15. Apply the Zica Laser replacement and compare the result
Review the manifest before running the modified game. It should identify the exact OpenTyrian build and original file hashes, the starting front-weapon selection, the Pulse-Cannon and Zica Laser definitions, and the references or bytes the patch changes.
Require the old values, replacement values, computed file offsets, and an explanation for every changed file. Record whether file lengths changed and whether that was expected. The restore instructions should identify the clean files or original bytes needed to undo the swap.
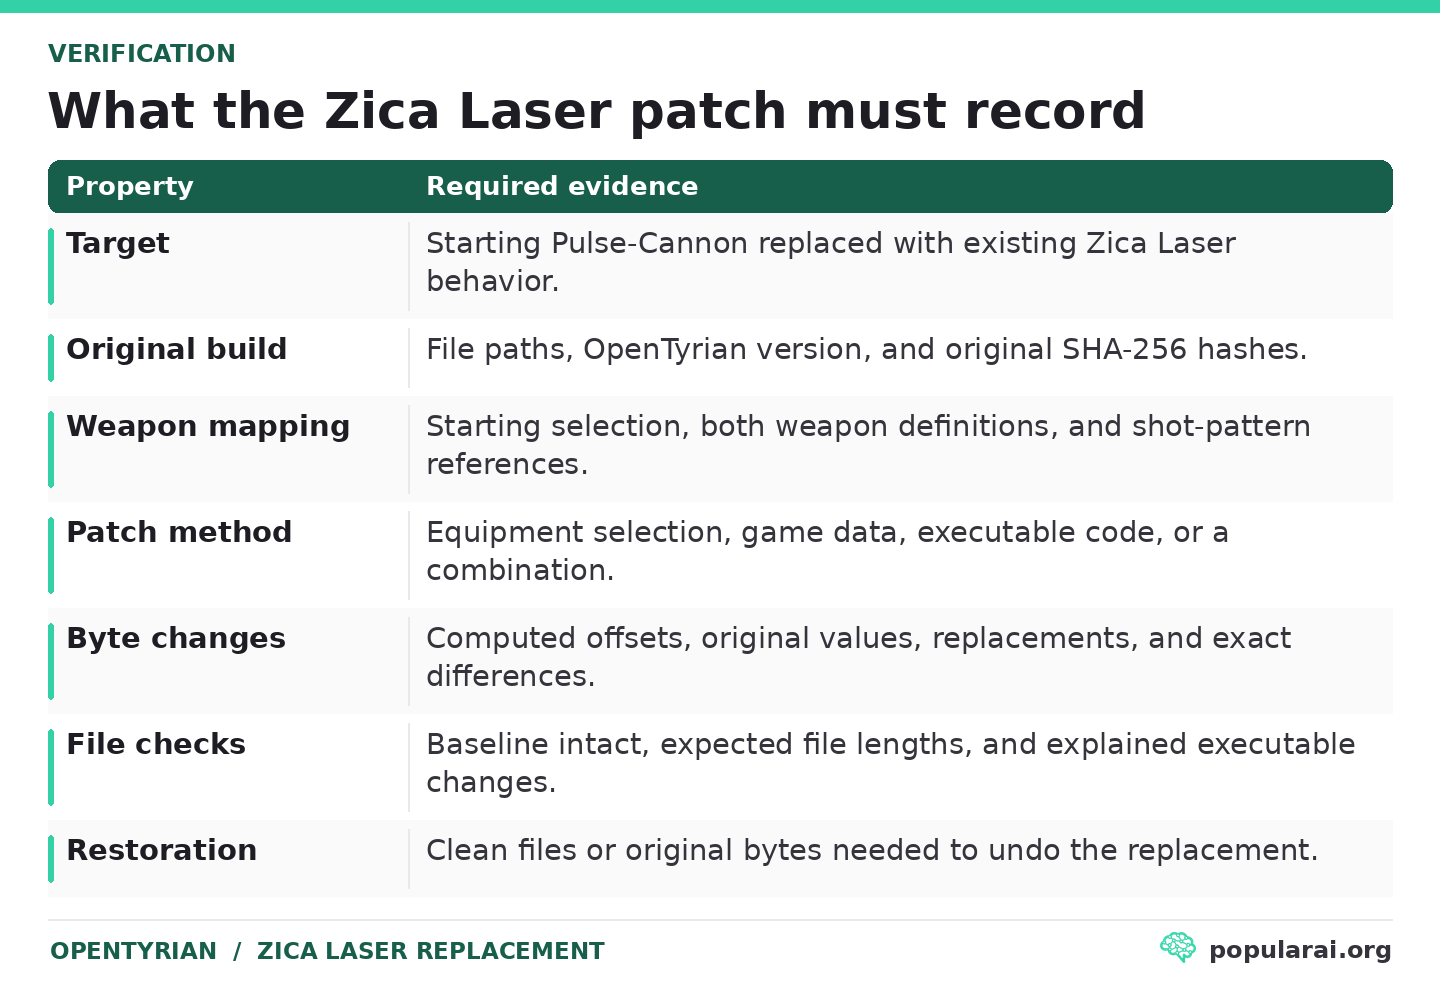
A hexadecimal offset is useful only if the patcher can derive it from the record layout and match the expected original value. Keep a copy of the manifest for the first successful change so you can compare it with later adjustments.
15.1. Apply the patch and verify the files
If the agent has written the patcher but has not applied it, ask it to run the patch against the working copy and verify the result.
Apply the verified Zica Laser replacement to the modded copy,
then run the verification script.

Confirm that baseline is unchanged. List the modified files and
exact byte differences, and match them to the patch manifest.

Report whether opentyrian.exe changed. If it did, explain the
code change and verify its original and replacement bytes.

Show how to restore the original starting weapon.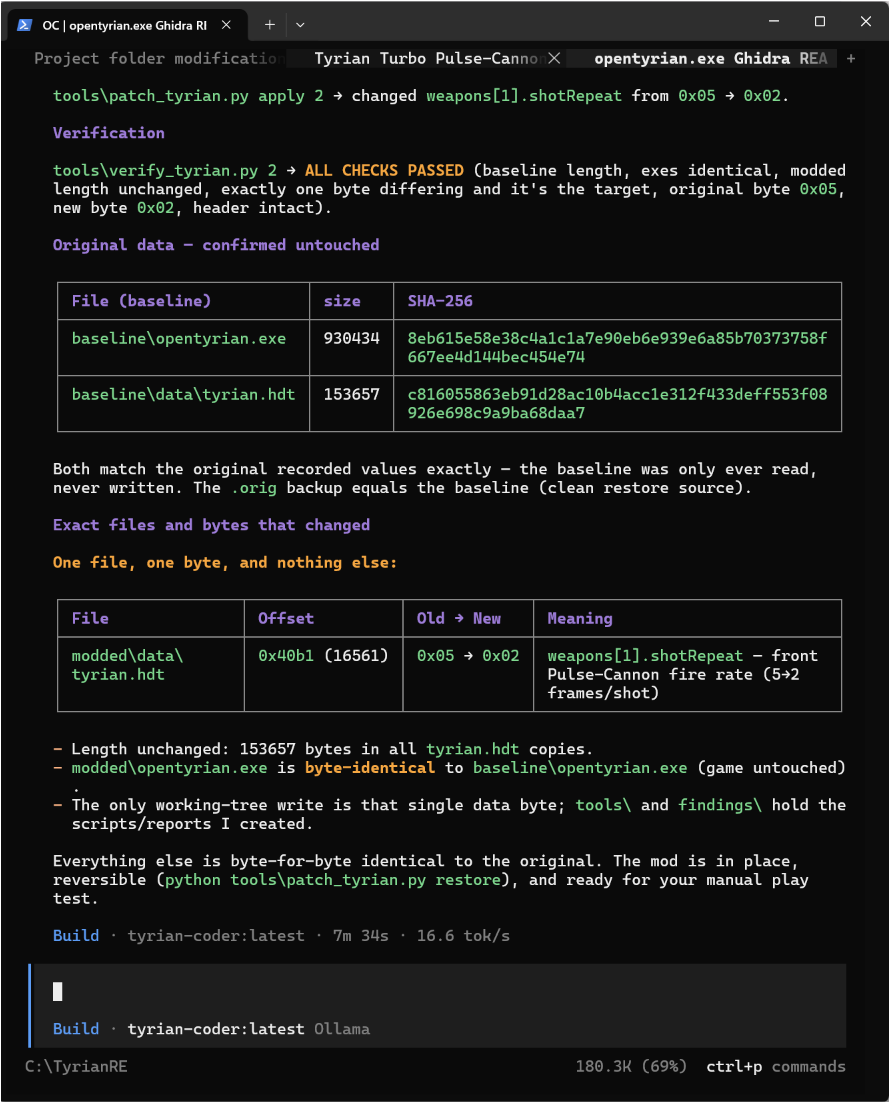
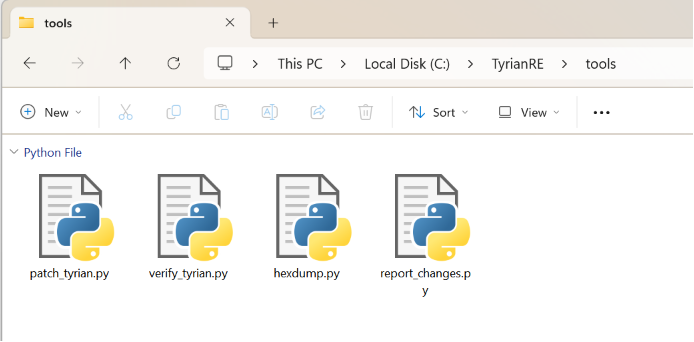
Keep the patcher under C:\TyrianRE\tools and the report under C:\TyrianRE\findings.
You can still compare the two executable hashes with the existing PowerShell check.
$original = Get-FileHash `
  "C:\TyrianRE\baseline\opentyrian.exe" `
  -Algorithm SHA256

$modified = Get-FileHash `
  "C:\TyrianRE\modded\opentyrian.exe" `
  -Algorithm SHA256

$original.Hash -eq $modified.Hash
True means the executable is identical in both copies. If the result is False, the manifest must account for the executable changes. Judge the result against the documented patch method. An unexplained difference is a reason to stop and inspect the files.

If you need Python for the patcher, install a current Python 3 release for Windows and check the launcher.
py -3 --version15.2. Launch the modified game
Close the baseline game, then launch the copy under modded.
Set-Location "C:\TyrianRE\modded"
.\opentyrian.exe
Start a fresh Episode 1 story game with the same difficulty and starting power level as the baseline run. Hold fire, look at the projectiles, and listen.
In our run, replacing the Pulse-Cannon with the Zica Laser produced a noticeable change in all three parts of the weapon’s presentation. That is the result to check on your copy. A changed menu label alone cannot establish that the weapon replacement worked.
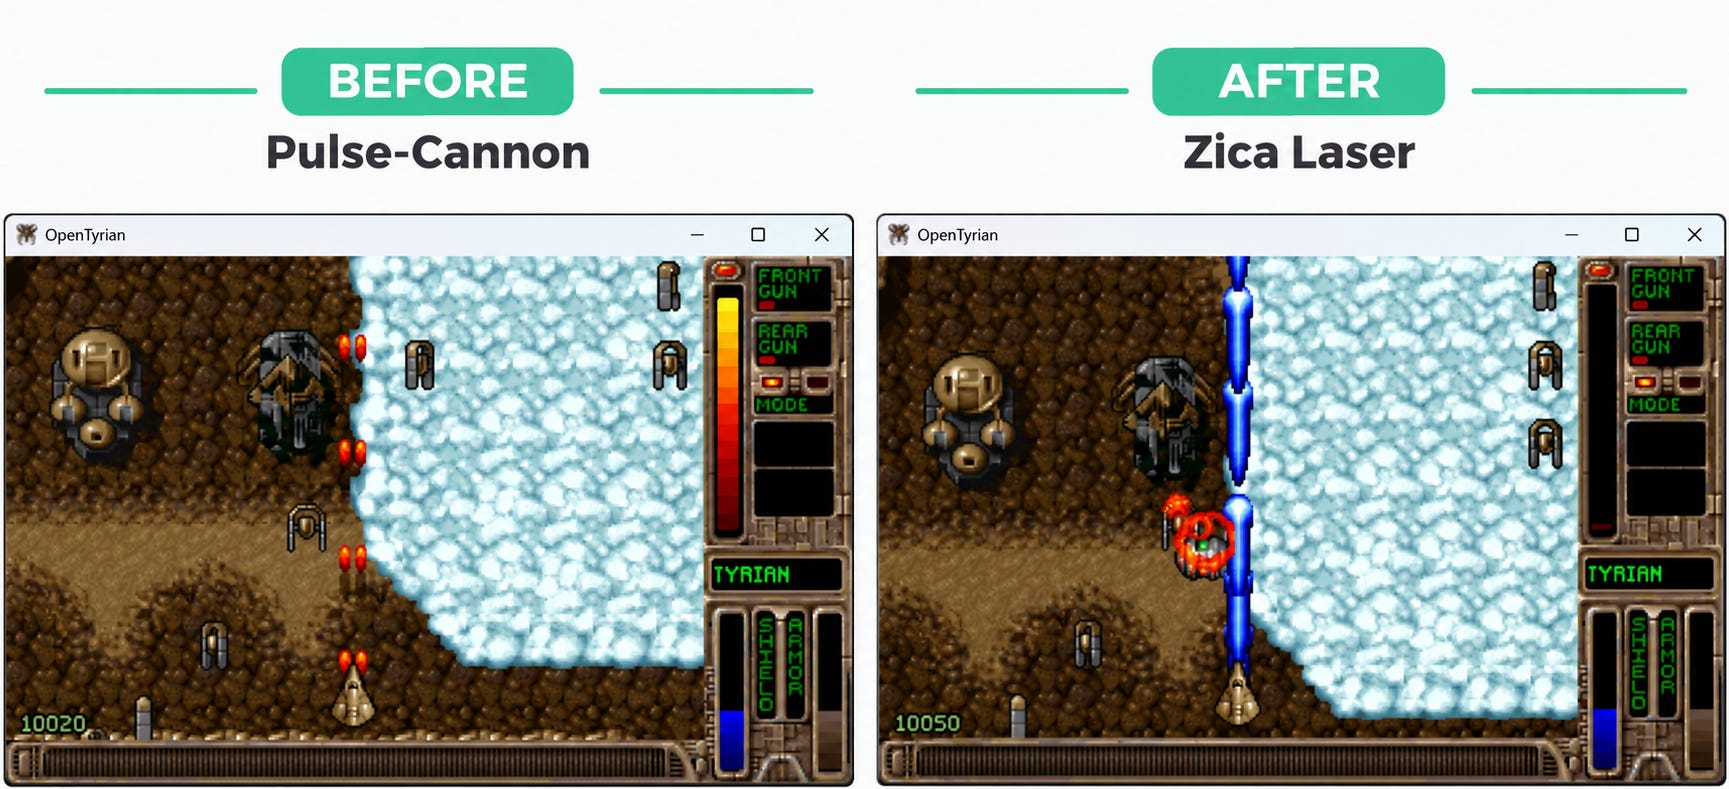
Capture a short clip of each run with game audio enabled, using the same opening stretch of the level. Compare the shots’ appearance, their firing pattern, and their sound. Then check sustained fire, generator behavior, movement, menus, and level loading.
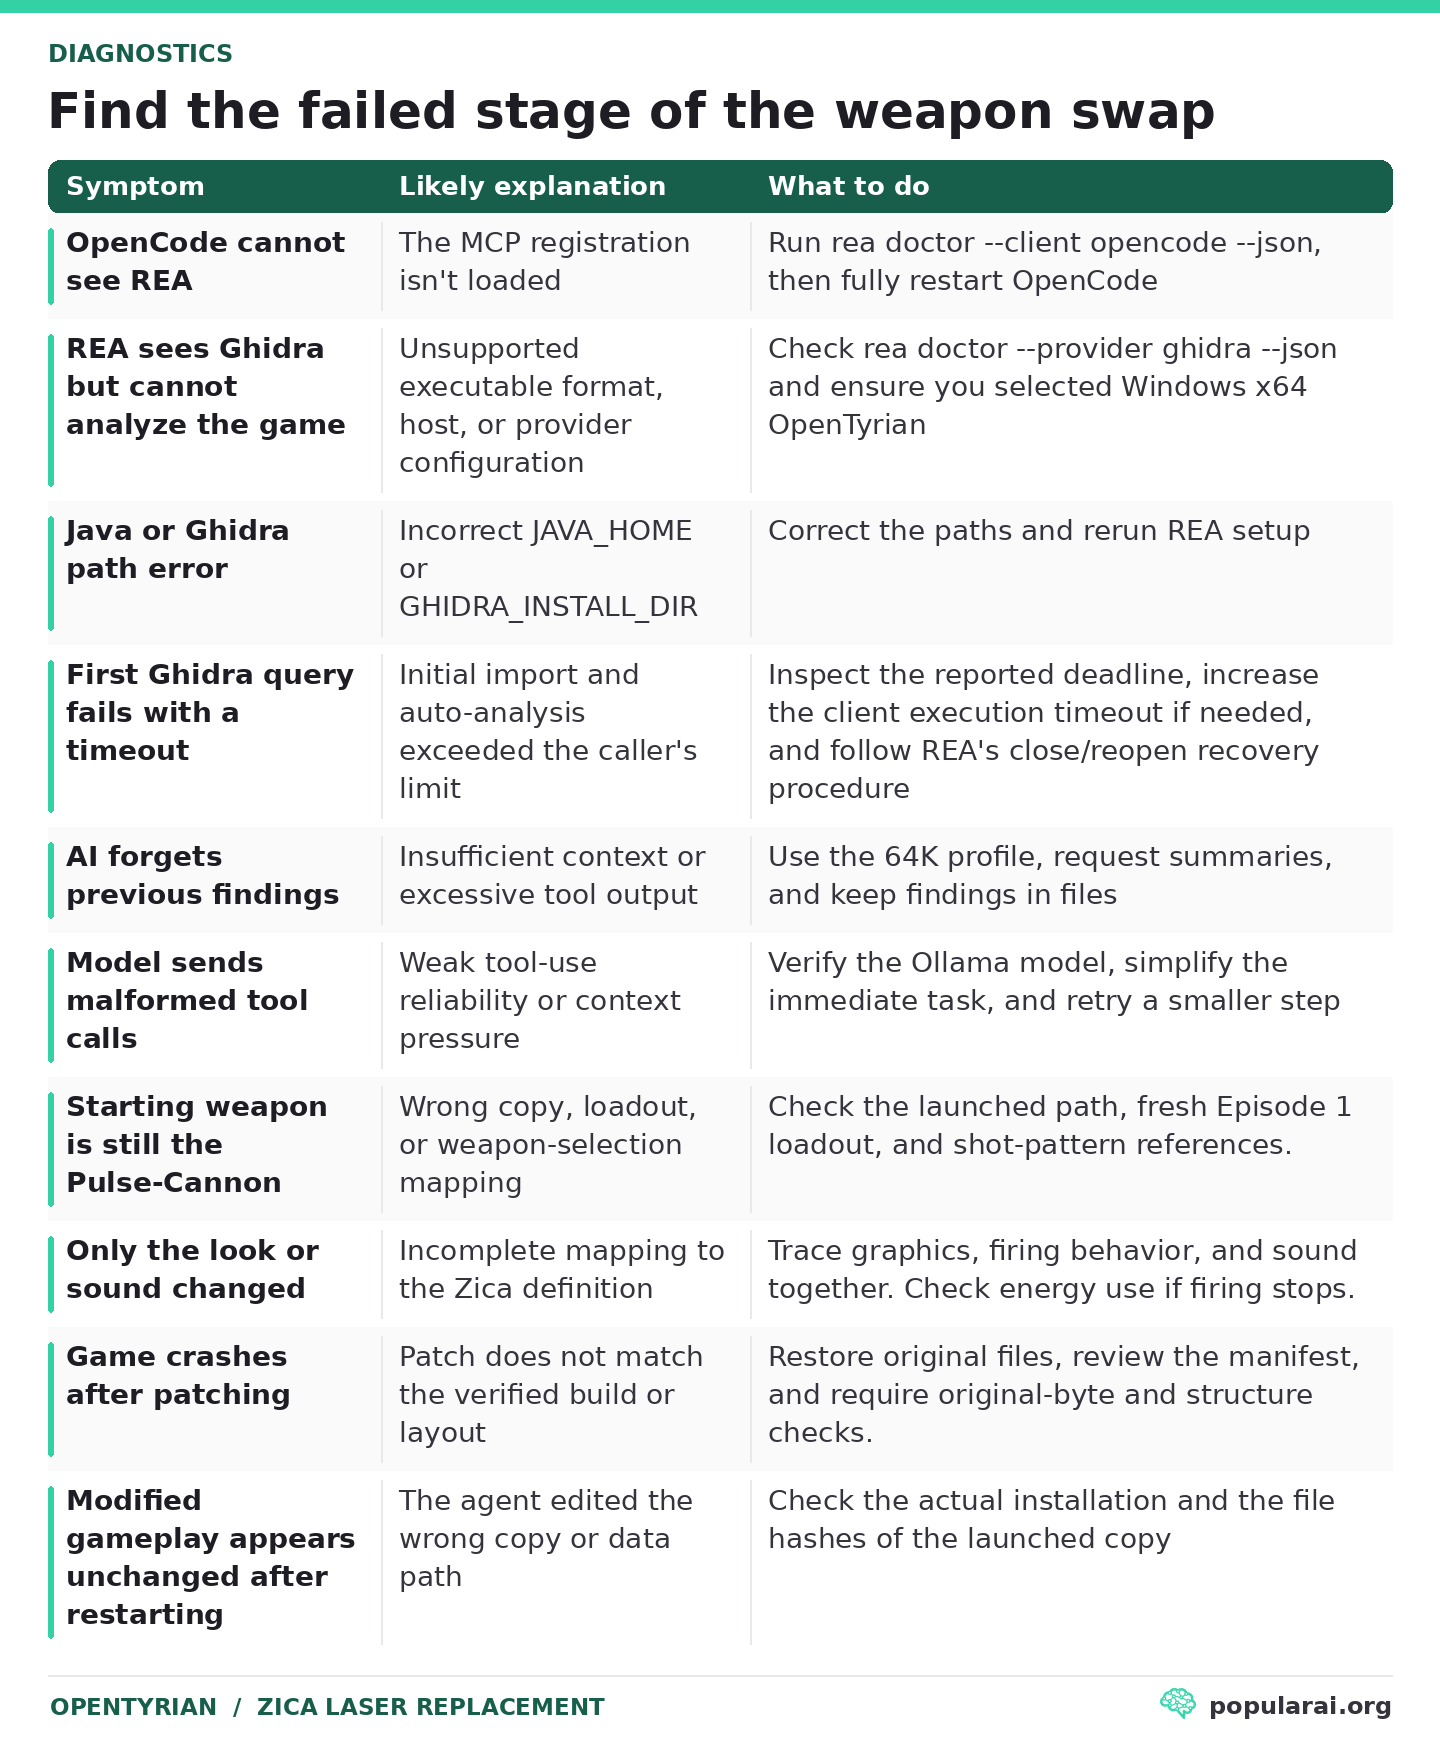
16. Troubleshoot OpenCode, Ghidra, and the patch
Find the first stage that fails.
▪ If OpenCode can’t see REA, run rea doctor --client opencode --json and fully restart OpenCode.
▪ If REA connects but Ghidra rejects the target, run rea doctor --provider ghidra --json and check the host, provider, and executable format.
▪ Make sure you downloaded the Windows x64 game archive.
▪ For a Java or launcher error, correct JAVA_HOME or GHIDRA_INSTALL_DIR before running setup again.
If the initial Ghidra query times out, check the reported deadline and the current session state. If the model forgets earlier findings, use the 64K profile if it fits, reduce the amount of tool output per request, and keep reports on disk. Malformed tool calls are a reason to check the selected Ollama model and retry a smaller task.
If the starting weapon still behaves like the Pulse-Cannon, confirm that you launched the modified copy and started the intended Episode 1 loadout. Recheck the weapon selection and shot-pattern references. If only the appearance or sound changed, compare the complete mapping with the Zica Laser definition. If firing stops after a short burst, inspect generator behavior and energy demand. For a crash, restore the original files and check the patch against the verified layout. If the change disappears after restarting, confirm the launched path, data files, and saved loadout.
16.1. Recovering from a Ghidra timeout
REA distinguishes the MCP connection from Ghidra’s actual analysis process. A successful open_binary call does not guarantee that the first analysis query has finished.
If a query times out, the agent should inspect REA’s session state. Where appropriate, it should use close_binary followed by a new open_binary call rather than repeatedly issuing the same query against an uncertain session.
OpenCode V2 lets you configure the MCP execution timeout. If a request expires, use REA’s guidance for recovering the Ghidra session before retrying.
16.2. Recovering from a confused agent
Local models sometimes lose the thread of a lengthy reverse-engineering assignment. They may begin guessing, repeating tool calls, or exploring unrelated functions.
Give the model the saved findings and ask for one next operation. For example:
Read findings\analysis.md and the current patch manifest.

Summarize what is confirmed and what remains unknown.

Do not repeat completed investigation work.
Do not edit anything yet.

Identify the single next REA operation that would
best resolve the remaining uncertainty, then run it.
If you start a new conversation, instruct the agent to read the stored findings before analyzing anything again.
Ask for the next tool result to be written back to the report. That gives you a place to resume even if the next import is slow or you need to restart the model.
17. Turn the patcher into a weapon-selection tool
Once the Zica Laser replacement works, ask the agent to turn the patcher into a small local tool. A first version could let you inspect the original starting weapon, apply the verified Zica replacement, or restore the Pulse-Cannon.
Have it preview the affected files and record references before applying a change. It should recognize both a clean installation and an already-patched copy, check the expected bytes, and keep a usable restore path.
Later, you can add other existing weapons after the agent verifies their definitions and selection paths. Keep each weapon’s graphics, firing pattern, sound, and energy requirements together when checking the result. A selector that only changes a displayed name will be obvious the moment you fire.
18. Try a version-specific executable patch
For a second project, pick a mechanic controlled directly by compiled code. Follow the same evidence trail, then check whether the change belongs in the executable. Here are a few candidates.
The player’s movement-speed calculations.
A weapon cooldown or projectile-count limit.
Enemy damage calculations.
Shield regeneration or collision behavior.
The rules governing enemy targeting.
Those tasks typically require more careful code analysis. Some can be implemented by changing a constant in the Windows executable, while others may require an instruction-level patch or a small code hook.
A possible next agent assignment is:
Using our existing OpenTyrian REA investigation,
find one gameplay mechanic that is controlled by
compiled code rather than an external data table.

Prioritize player movement speed.

Trace the relevant code using REA and Ghidra.
Determine whether a small, verifiable modification
is possible.

Do not assume a constant exists.

If a safe binary patch is feasible, create a
version-specific patcher that verifies the original
instruction bytes, maps analysis addresses to file
offsets correctly, preserves the baseline executable,
and patches only the working copy.

If it cannot be implemented safely, report the
technical reason and suggest another mechanic.
Here, REA’s read_bytes and address_to_file_offset capabilities can be particularly useful.
A Ghidra address identifies a location in the loaded image. To patch an instruction on disk, the agent has to map that address to the executable’s file layout and confirm the original bytes at the mapped offset. Keep the same validation discipline you used for the data file: target a specific build, write to the working copy, and check the diff.
This REA-assisted reconstruction of the DX-Ball game shows how binary analysis, code verification, and real gameplay testing work together.
19. What to keep from your OpenTyrian investigation
A successful run leaves you with a modified game, a reproducible patch, and the evidence needed to check or restore it. Keep these pieces together.
The first-look report identifies the executable and the actual Ghidra results returned through REA.
The analysis follows the loader and gameplay code to the weapon definitions.
The record mapping connects the starting front weapon to the verified Zica Laser behavior.
The patcher and manifest show which file bytes changed and how to restore them.
The baseline and modified Episode 1 runs let you compare the Pulse-Cannon and Zica Laser’s appearance, firing pattern, and sound.
This is a walkthrough for deriving and testing a patch on your copy. The exact bytes, offsets, and effect on the weapon come from your local analysis and play test. Keep them in the evidence report so you can reproduce the result later.
Choose your next game mechanic to reverse-engineer
Start with a game you know well enough to notice when its rules change. In Tyrian, swapping the starting Pulse-Cannon for the Zica Laser gives you an immediate visual and audible comparison. Keep the original and modified recordings, the patch manifest, and the restore instructions together so you can reproduce that result before trying another mechanic.
For another experiment, trace shield recovery, boss behavior, or the speed of enemy projectiles. Pick one change with an observable result, such as slower enemy shots in the same opening wave. Ask the agent to identify what controls that behavior, keep the original intact, and give you a before-and-after test you can run in a minute.
Explore more from Popular AI:
Start here | Local AI | Builds & gear | Autonomy & policy | Fixes & guides | Popular AI podcast